CONFIGURE SOAP API FOR CUSTOM NODE
SOAP Custom Integration to create a node. Here in this node, we will use zip code to retrieve the location details of a place.
This tutorial explains the procedure to configure a SOAP Node with Zip code services. A customer can get the location details like ' State, city and area code' by just providing a zip code.
Prerequisites
- Understanding of SOAP API custom node integration.
- Creating a flow and setting up rules.
Configuring a Node
- Navigate to Integrations > Add Integrations > Custom Node > REST, now fill in the required details. Select Custom Category option and choose Soap Integration for a new SOAP node. Keep the 'Create blank integration' option to default and click OK to proceed.
- Copy and paste the WSDL URL and click PARSE to list the methods.

You can access a WSDL file using a URL or in a zip format. If the WSDL is in 'https' format, just copy and paste the URL in the WSDL location, if the WSDL file is in zip format, you need to download and then locate and set the path to the file.
3. Click PARSE; a pop-up window with all the available methods are displayed; select the methods you want to configure and click OK.
Configuring Request Details
All the methods selected are displayed under the left menu. Select a method you want to configure.
Under the setting tab > Request Details block, you can see the configurable items listed. You can edit the method name from the default one to reflect a more realistic case. Enter the Request timeout and connection timeout details, however, these are optional fields.

Configuring Body Details
- Configure the body type (XML-selected by default) from the drop-down located on the right corner of the body block. Now configure the body content in the xml file with $ of variable string. Use $(variable_name) for values that need to be replaced with values dynamically during the flow execution.
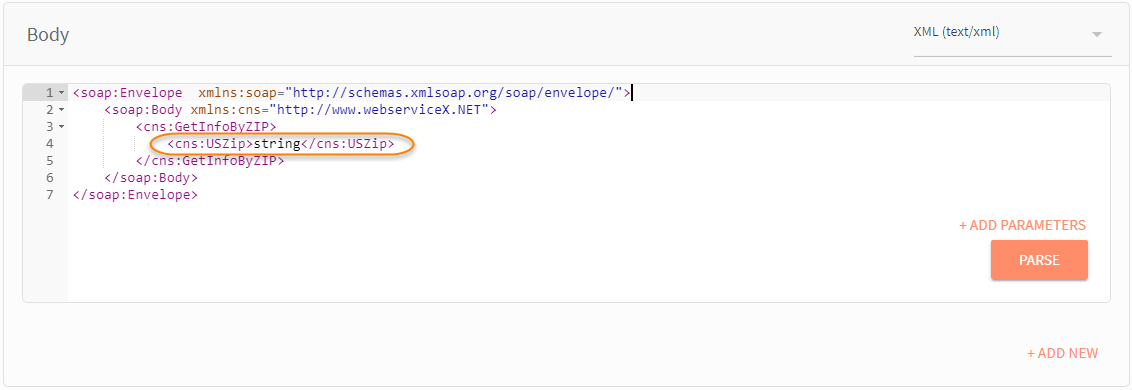
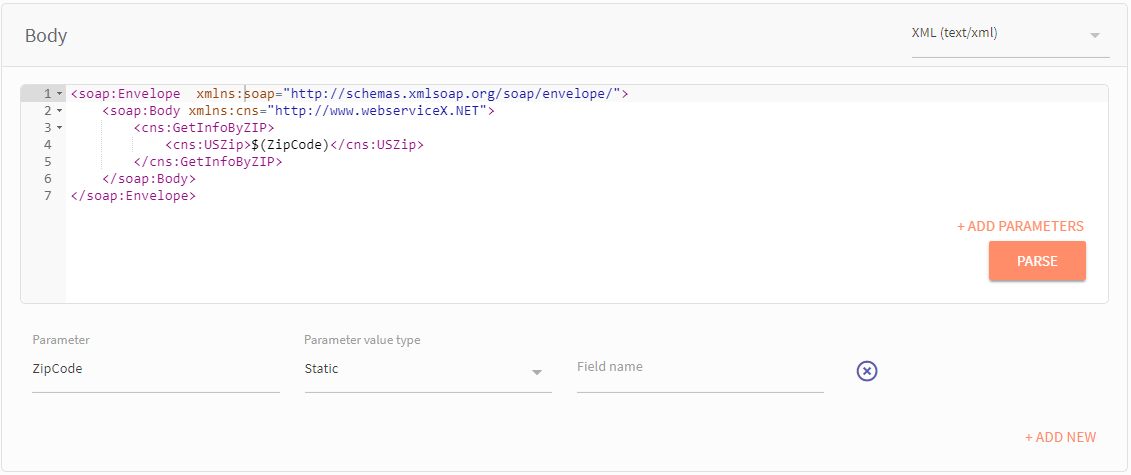
- Once you have defined the variable in the body XML, click Parse. The defined variables are populated with the key-value parameters as shown in the image below. Provide a label name for each of the parameters. These parameters are displayed during the runtime.
Here, we have replaced String with ZipCode, and the variable is parsed under the parameter, change the Parameter value type to Dynamice.
Configuring Response
You configure Node Events and Node Variables in the response block. The node events and variables are parsed from the sample response XML file, generally available in the WSDL file document. You can also add and configure parameters manually. Click corresponding 'ADD NEW' to add a new parameter line.
- On the Response block, click Import from sample.
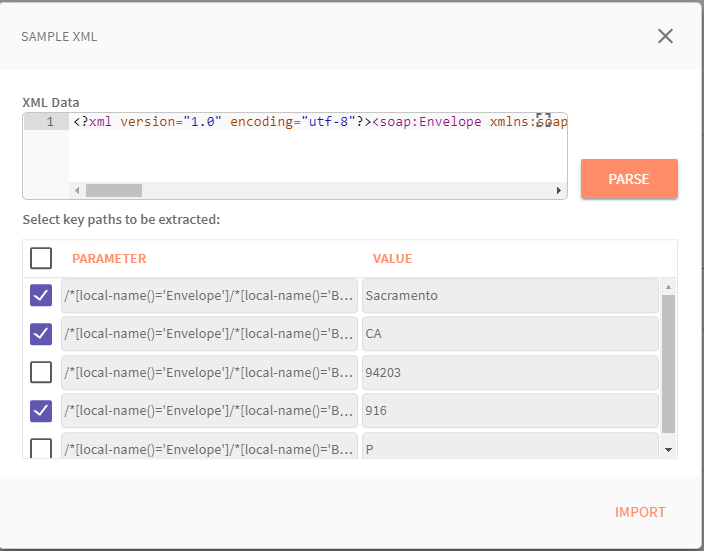
SAMPLE XML pop-up window pops up.

- Copy & paste the Sample response XML and click *PARSE
- The List of variables are shown, choose the required variable an click Import
The node events and selected variables are displayed.
Response block involves two-sections: (i) Node events and (ii) Data to be returned to the flow.
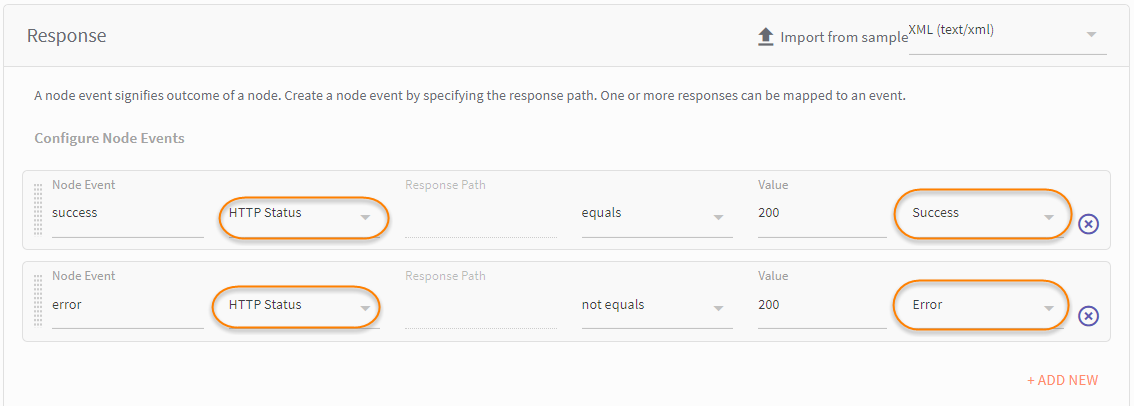
i.) Node Events: Node events can be associated with the node edges. You can define node events based on HTTPS Status/HTTPs Header/body and configure the other values accordingly. A node event signifies outcome of a node. One or more responses can be mapped to an event.
You can fetch Node Events from (i) HTTP Status, (ii) Body, (ii) HTTP Header. When you choose Body, provide the reference path to locate the exact object. In the above example, Node event is fetched from HTTP Status. When the HTTP Status is equal to 200, it is associated with the Success edge. 201 is the response code for a request implies that the request is successful.
(ii) Data to be returned to the flow.
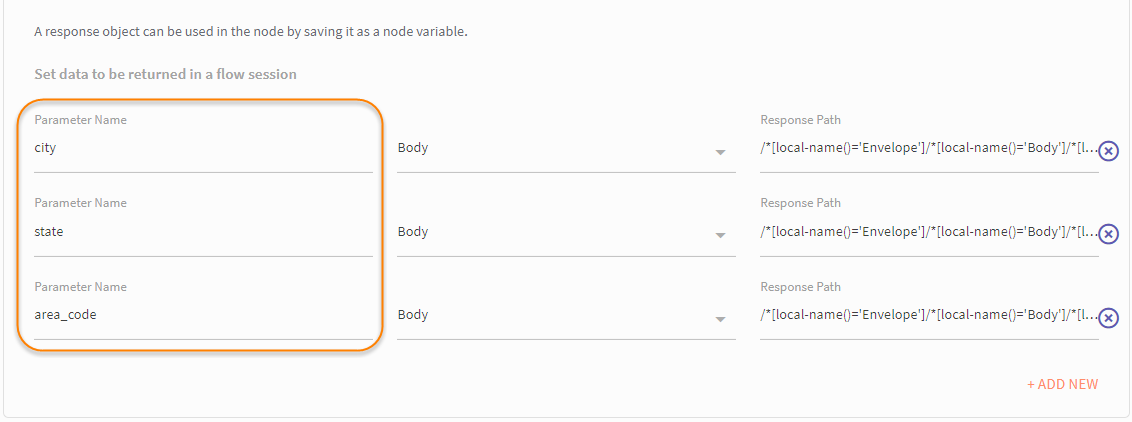
A response object can be used in the node by saving it as a node variable. In the example below, we have extracted 'city, state, and area_code' variables from the sample response file and stored them in as node variable, this node variable can be used to implement logic in the node, You can also manually enter the variable name and relative reference path.
Change the parameter name as required for
- Click SAVE to save the configuration.
Setting up NODE UI
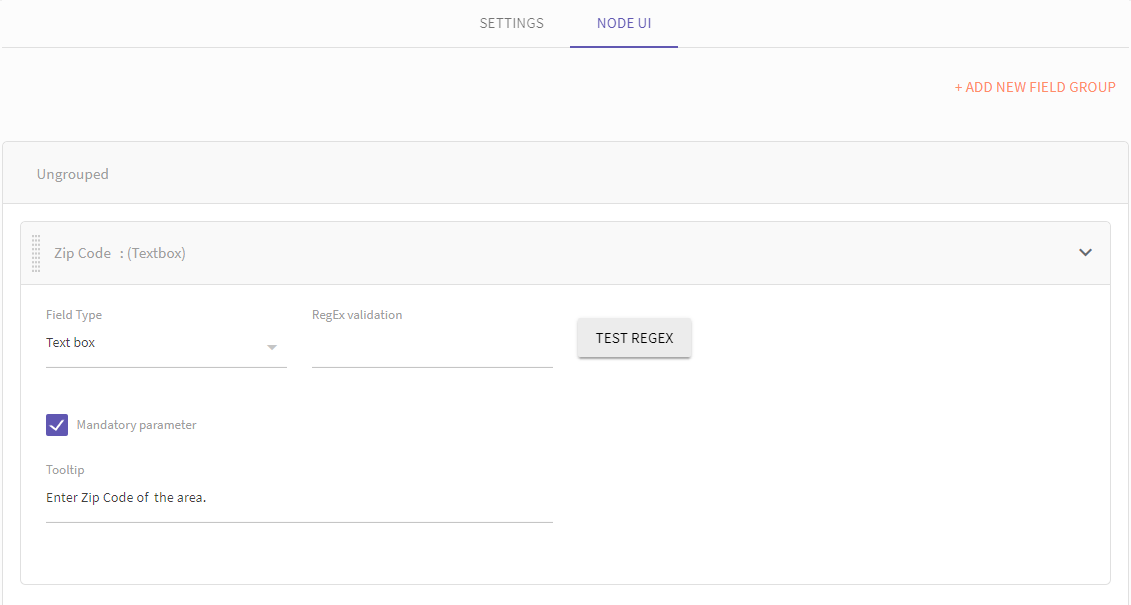
The NODE UI tab has all the ‘dynamic’ parameters, for which the field type is to be configured. The Node UI tab allows you to configure the ‘Dynamic’ parameters which are defined in the API. Initially, all the parameter are grouped under ungrouped section. you can define new groups and
add parameters from the ‘Ungrouped’ group by dragging the same to the newly defined group.
Here in this example, the 'Zip Code' parameter from the body was set to dynic
Updated over 6 years ago