Messenger
This section describes the enhancements to the Facebook messenger, via a multi-layered persistent menu. The messenger platform brings developers on a three-level menu.
- One top-level menu (maximum of three options are executed at each level)
- Two sub-level menus (maximum of five options are allowed at each level)
Enhancement in the IMIconnect Platform
Users can send or receive messages through this application.
The manage facebook application page consists of the following settings:
The below figure illustrates the various settings that are used to manage Facebook page.
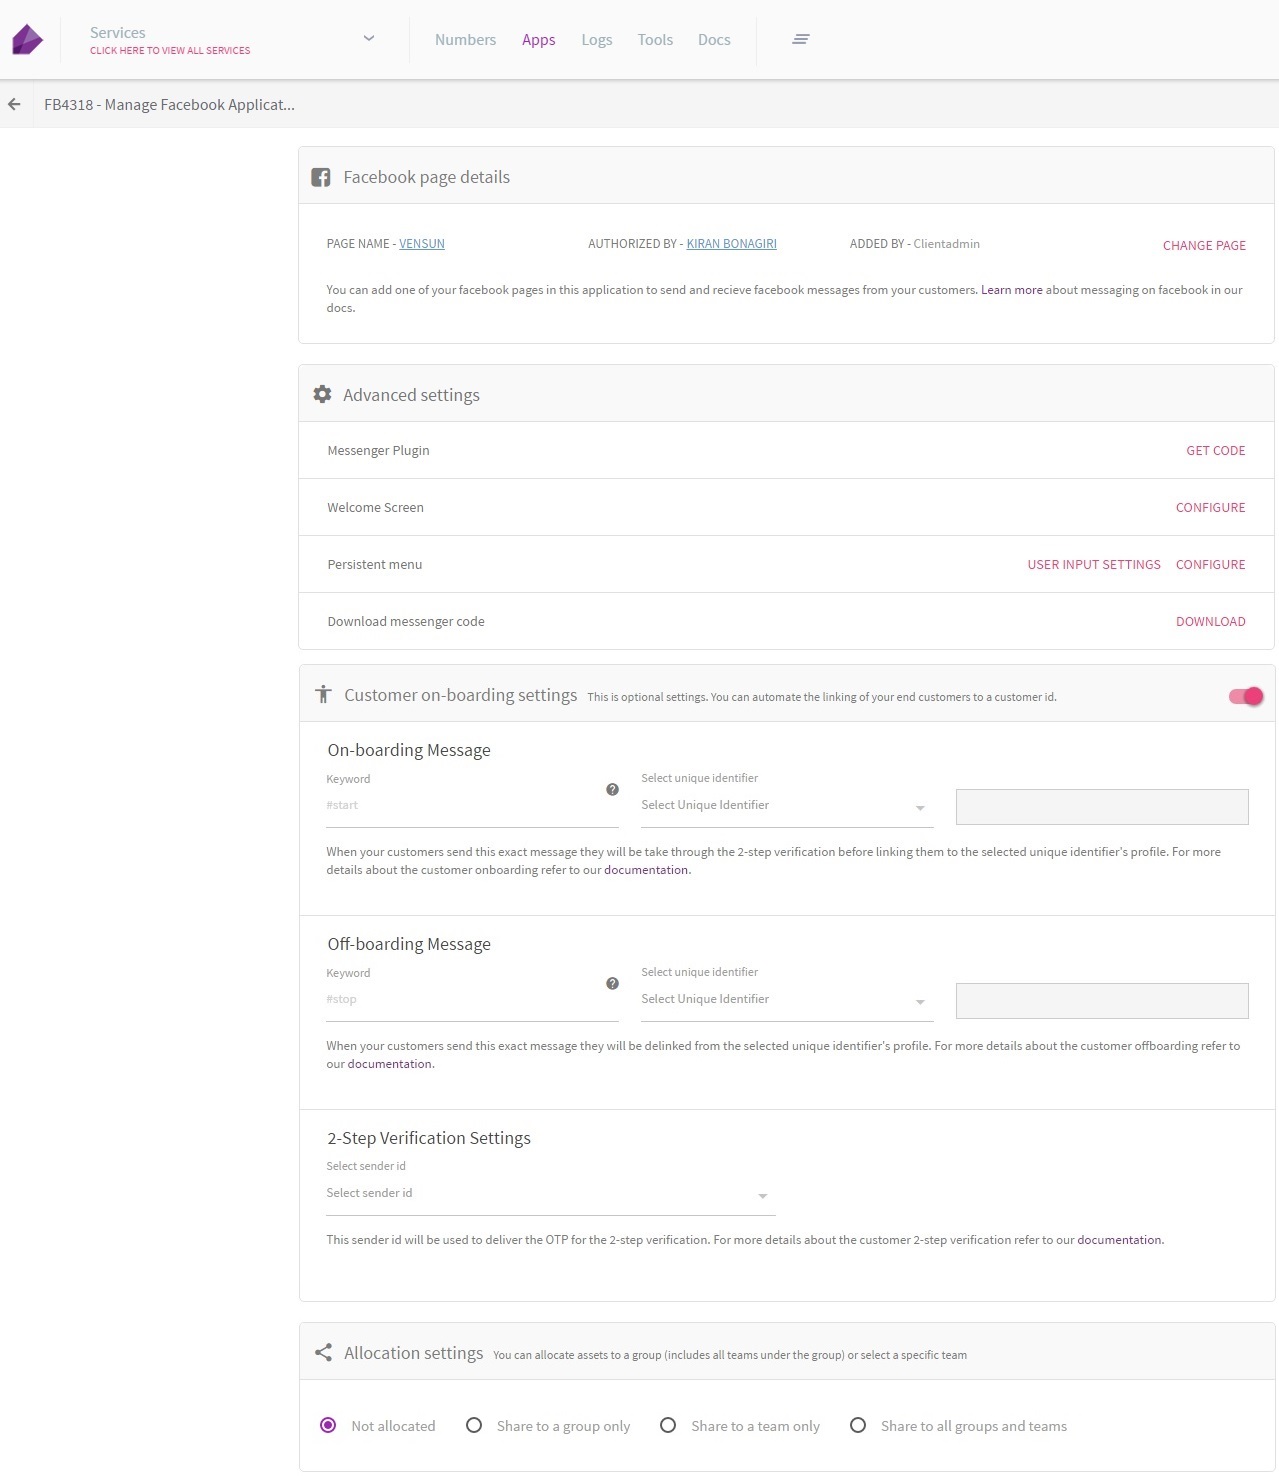
Figure 1: Manage Apps
Facebook Page Details
You can add one of your facebook pages in this application to send and receive facebook messages from your customers.

Figure 2: Facebook page details
The table below provides details on the parameters under facebook page details.
| Field | Description |
|---|---|
| Page name | Name of the page created. |
| Authorized by | Displays the name of the person authorized to manage the page. |
| Added by | Displays the name of the person who added the page. |
| Change page | Redirects to facebook login page. |
Advanced Settings
This section enables client's to get the Messenger Plugin, configure the Welcome Screen, Persistent menu, and Download messenger code.

Figure 3: Advanced Settings
Note:
You cannot configure a Persistent menu unless you configure the Welcome screen.
Messenger Plugin
The messenger plugin fetches the messenger code, depending on which plugin is selected.
For more information, see image below.
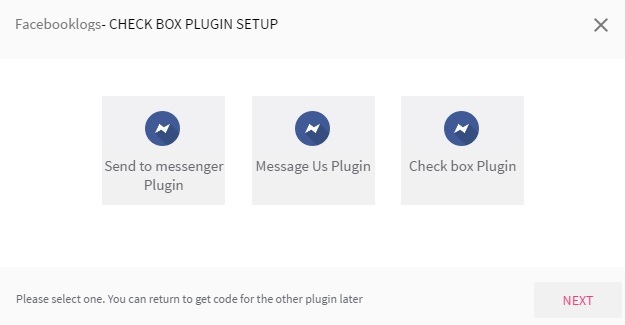
Figure 4: Messenger Plugin
| Plugin | Description |
|---|---|
| Send to messenger Plugin | A JS code, which is required to be included on your webpage is displayed. A code sample is shown below, in the Code: Send to Messenger Plugin Setup.This plugin is used to trigger an authentication event to your webhook. User can pass the data that and know which user and transaction was tied to the authentication event, and link the user through back-end. |
| Message Us Plugin | A JS code, which is required to be included on your webpage is displayed. A code sample is shown below, in the Code: Message Us Plugin Setup tab.This plugin can be used to immediately start a conversation. |
| Check box Plugin | Displays a CONFIGURE CHECK BOX PLUGIN SETTINGS pop-up window, as shown in the figure below.This plugin allows a you to authenticate the customers with Messenger, and start a thread on your website. For security reasons, the plugin will render only when loaded on a domain that you have whitelisted. |
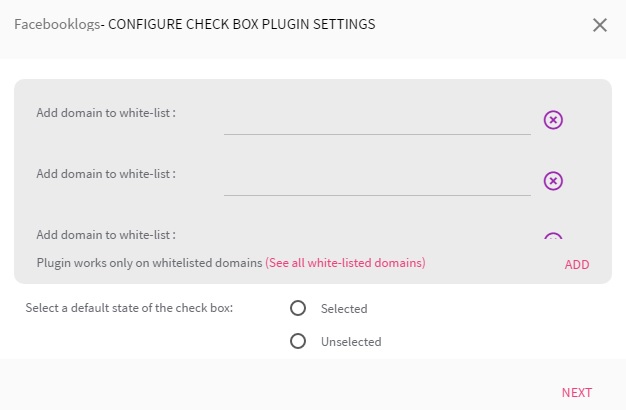
Figure 5: Configure Check box Plugin Settings
<div class="fb-messengermessageus"
  messenger_app_id="252051681828862"
  page_id="405043713200163"
  color="blue"
  size="standard">
</div>
<div class="fb-send-to-messenger"
  messenger_app_id="252051681828862"
  page_id="405043713200163"
  data-ref="PASS_THROUGH_PARAM"
  color="blue"
  size="standard">
</div>
<script>
 window.fbAsyncInit = function()
 {
FB.init(
{
appId      : "252051681828862",
xfbml      : true,
version    : 'v2.6'
    });
  };

(function(d, s, id)
{
var js, fjs = d.getElementsByTagName(s)[0];
if (d.getElementById(id))
{
return;
}
js = d.createElement(s);
js.id = id;
      js.src = "//connect.facebook.net/en_US/sdk.js";
fjs.parentNode.insertBefore(js, fjs);
}(document, 'script', 'facebook-jssdk')
  );
</script>
<div class="fb-messenger-checkbox"
origin=PAGE_URL
  page_id="405043713200163"
  messenger_app_id="252051681828862"
  user_ref="UNIQUE_REF_PARAM"
prechecked="true"
  allow_login="true"
size="large">
</div>
Welcome Screen
Customers can configure the pages' welcome message on this page. A postback event with the configured payload is raised every time the Get started button is enabled.
To process this, create a rule in a service.
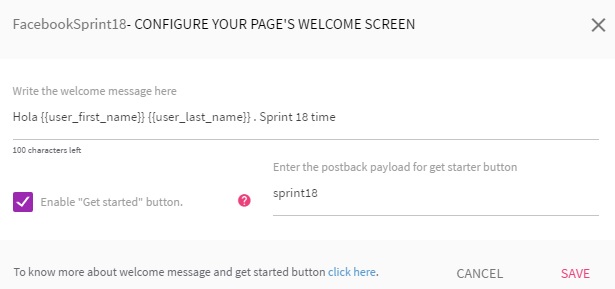
Figure 6: Configure Welcome Screen
Persistent Menu
The persistent menu can be configured up to three levels by clicking on the Configure link.
This menu is displayed in two modes:
- View
- Edit
Field | Description |
|---|---|
Contact Us | Enter a valid email address. Maximum limit is 30 characters. |
Select option type | Choose from one of the following options:
|
User Inputs Settings
If this option is enabled, then the user will not be able to type text or send pictures or other content. In that case, user can interact with a bot only via menu, quick replies, buttons, and web view.
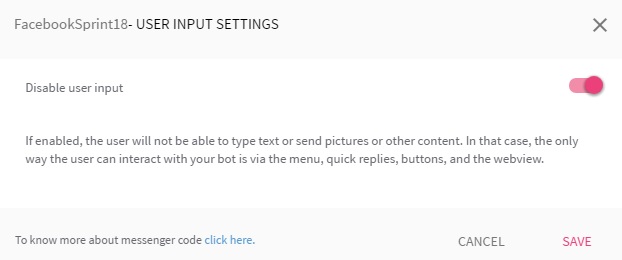
Figure 7: User Input Settings
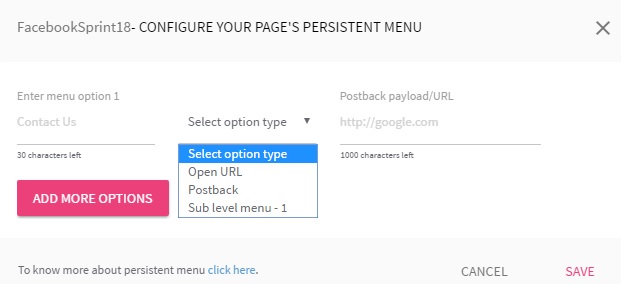
Figure 8: Configure Persistent Menu
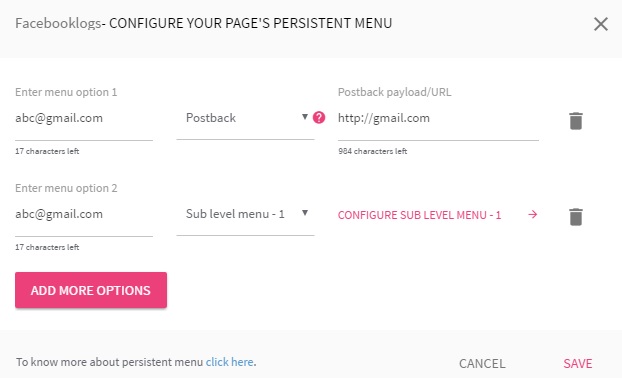
Figure 9: Configure first level menu
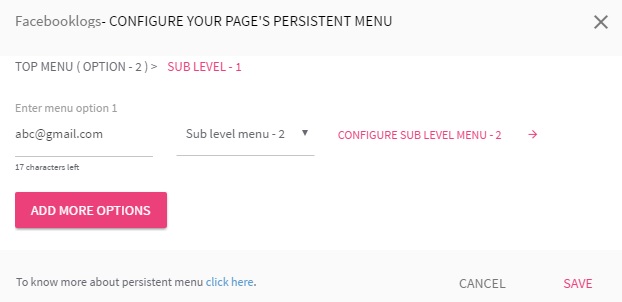
Figure 10: Configure second level menu
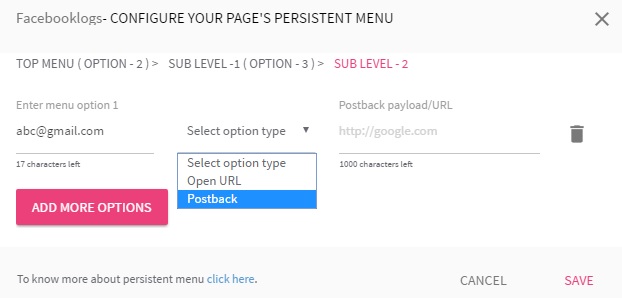
Figure 11: Configure third level menu
On completion, click Save.
Once the menu is configured, the configuration, all the configured levels can be viewed and edited using the Edit button.
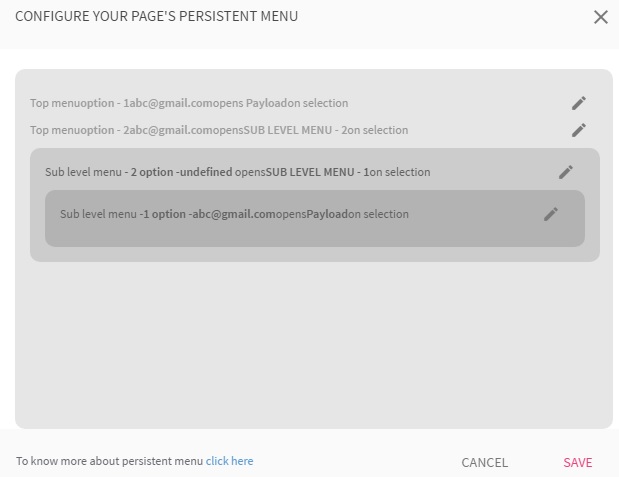
Figure 12: Edit
Download Messenger Code
This option enables users to fetch the messenger code and select the image resolution, from a range of 100 to 2000 pixels. Once the resolution is set, a download can be initiated by clicking on the Download link.
Customer On-boarding Settings
This is optional setting, where the user can automate and link the end customers to the corresponding customer ID.
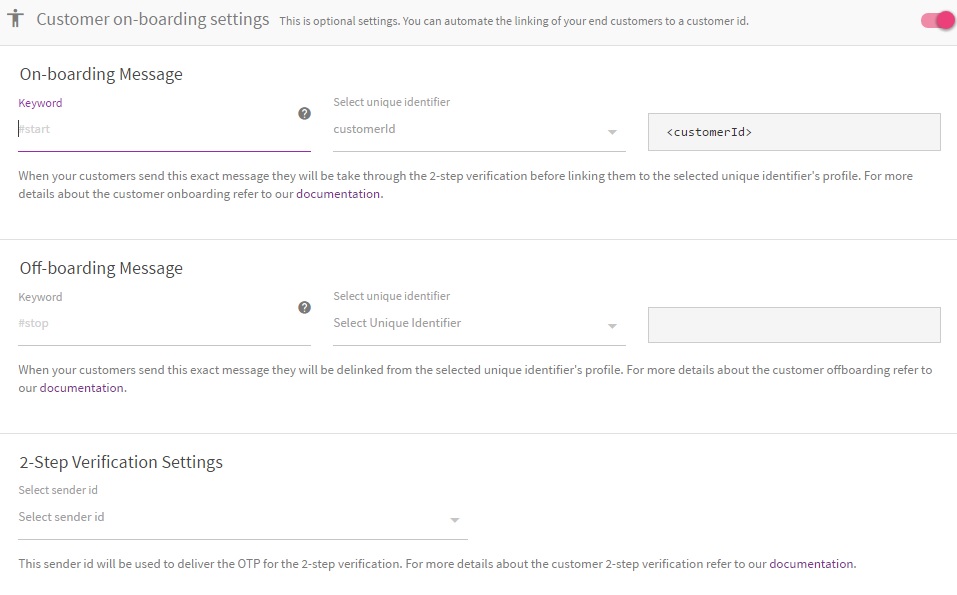
Figure 13: Customer On-boarding settings
The table below, details the various fields in the image.
Field | Description |
|---|---|
On-boarding Message | When customers send this message, it would be verified through a 2-step verification, prior to linking them to the selected unique identifier's profile.
|
Off-boarding Message | When customers send this message, they will be de-linked from the unique identifier's profile that is selected.
|
| 2-Step Verification Settings | Select a sender id from the available list menu. This sender ID is used to deliver an OTP for the 2-step verification. |
Allocation Settings
This is used to allocate assets to a group (including all teams under a group) or select a specific team. Table below defines the available options.
| Options | Description |
|---|---|
| Not allocated | Does not allocate assets to a group. |
| Share to a group only | Used to allocate assets to a new group or team. From the list menu, select a group or enable the Share to all teams under this group check box. |
| Share to a team only | Used to allocate this asset to a new group or team. |
| Share to all groups and teams | Used to allocate assets to all groups and teams. |
Updated almost 3 years ago