Sending and Receiving SMS
This tutorial describes how to send an SMS using a Sender ID. Let us assume, you as a customer have received promotional or discount offers on your mobile as SMS from a business enterprise or bank or telecom service provider. The SMS you received may display a text such as VF-XYZBK or HP-HCARE etc., The text represents a business name.
In this tutorial, we will purchase a Sender ID, create a service and send an SMS using the API.
Let us see the different steps involved in sending an SMS with a Sender ID using IMIconnect.
| Step | Description |
|---|---|
| Buy a Number | Buy a Sender ID from which an SMS is sent. |
| Create a Service | A service is a work space to hold your assets. Create a service and map the the purchased Sender ID. |
| Make an API request | Send an SMS through an API call. |
| Configure IMIconnect to Receive DR (Optional) | Configure DR notify URL to receive the confirmation once the message message is delivered. |
| Configure MO Notify (Optional) | Configure MO notify URL to receive a notification when a message is sent by an end customer. |
1. Buy a Number
Follow the steps below, to buy a Sender ID.
Note:
In some countries, governments and telecom service providers have placed restrictions on the SMS and Sender IDs.
You can view the restriction List on IMIconnect menu > Tools > SMS RESTRICTIONS.
- On the IMIconnect menu, click Numbers . The numbers screen appears. For new users this screen will not show any numbers.
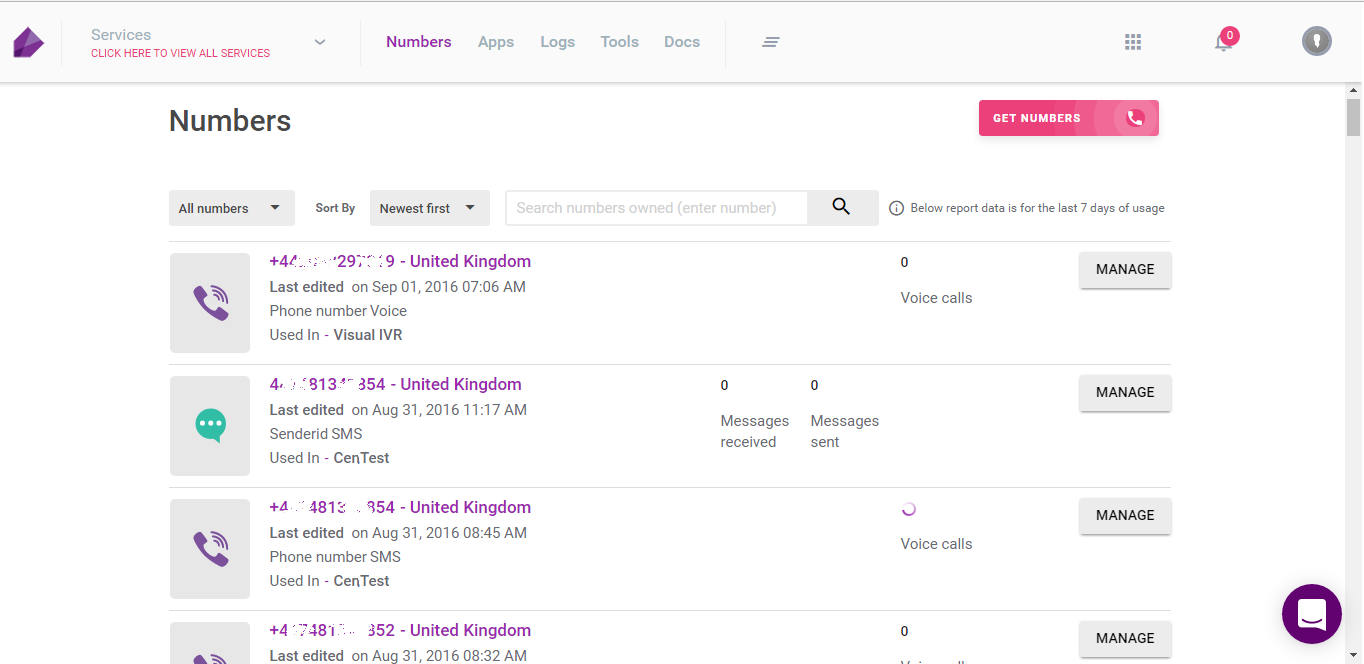
- Click GET NUMBERS and select SENDER ID. The Sender ID request screen appears.
- Enter the Country Name and click SEARCH. The Sender ID supported features and restrictions are displayed for the selected country.
- Click GET SENDER ID.
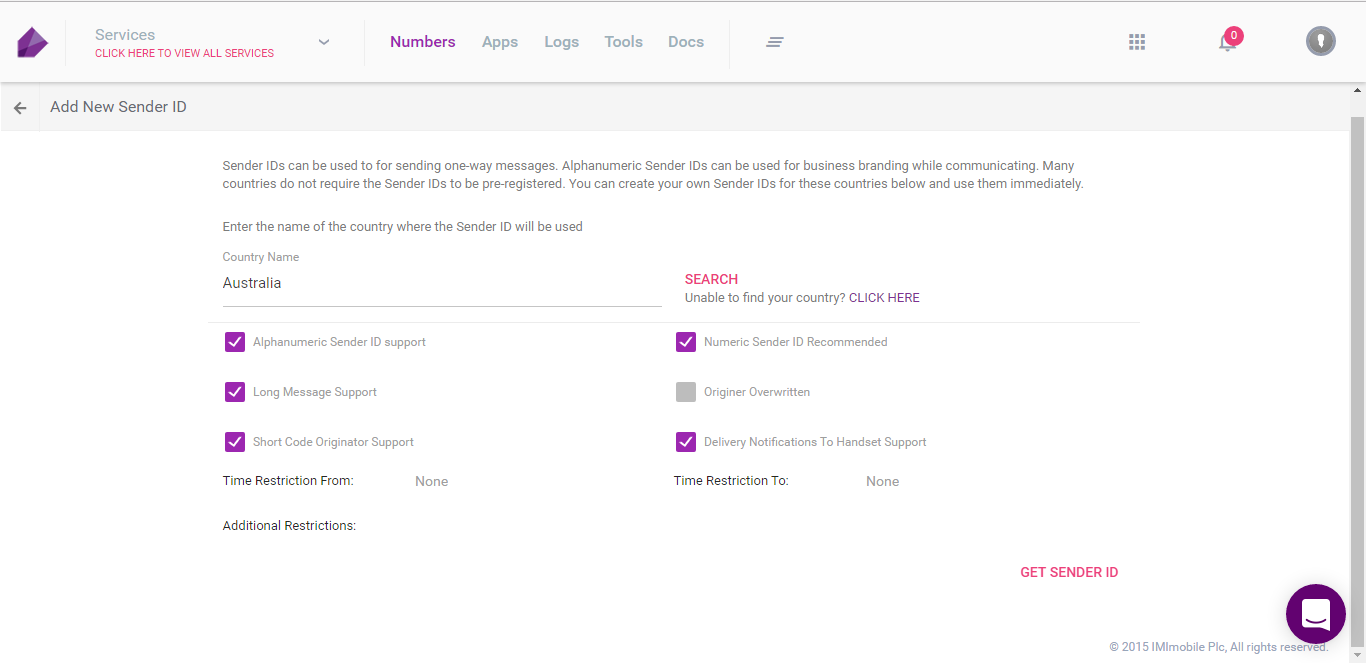
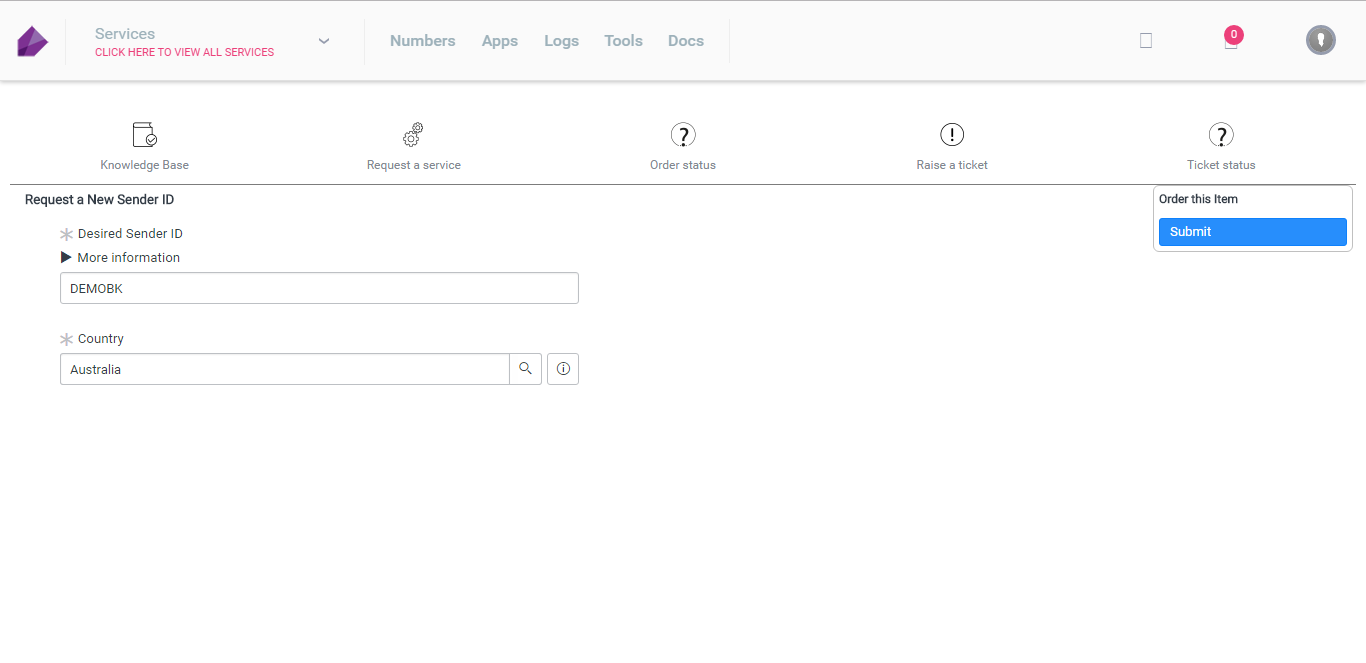
- The Sender ID purchase screen appears. Add the following details:
- Desired Sender ID: Enter the Sender ID you wish to buy.
- Country: Enter the country name in which the Sender ID will be used.
- Click Submit.
On successful request, the Sender ID is displayed on the numbers screen.
2. Create a Service
A service is a localized workspace within your account, allowing you to authenticate and authorize all external triggers including the APIs. When you purchase a number, you can configure it with a service. When you create a service, a Service Key is generated. The service key must be used in your API request.
To configure the purchased sender ID with this service, a service is required to be created first.
To create a service on IMIconnect, follow these steps:
- From IMIconnect menu, click Services. The services window appears.
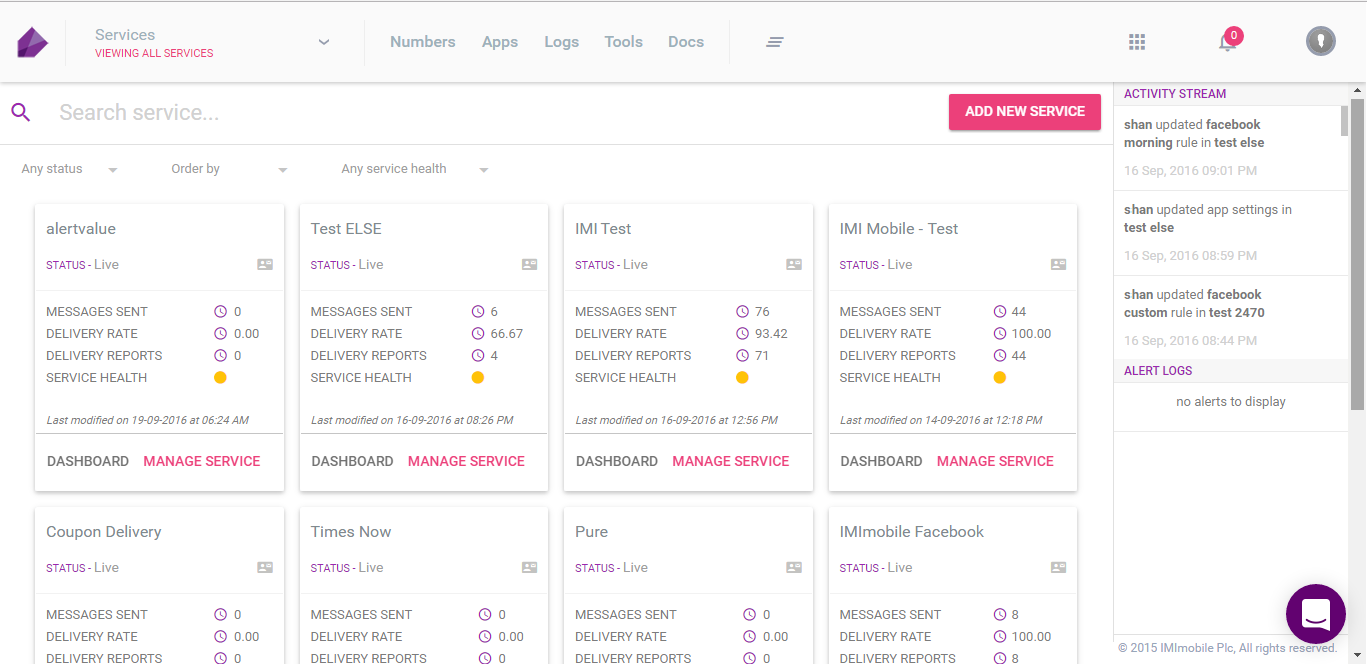
- Click ADD NEW SERVICE button. The Create new service screen appears.
- Enter the following details.
- Service name: Enter the name of the service.
- Description: Enter a short description for the service.
- Click NEXT: The service is created and the service General Settings screen appears.
- Click Numbers: From the SHORTCODES drop-down, select the purchased number and click SAVE.
You will find the Service Key under General Settings. Make sure to use this Service Key in your API call.
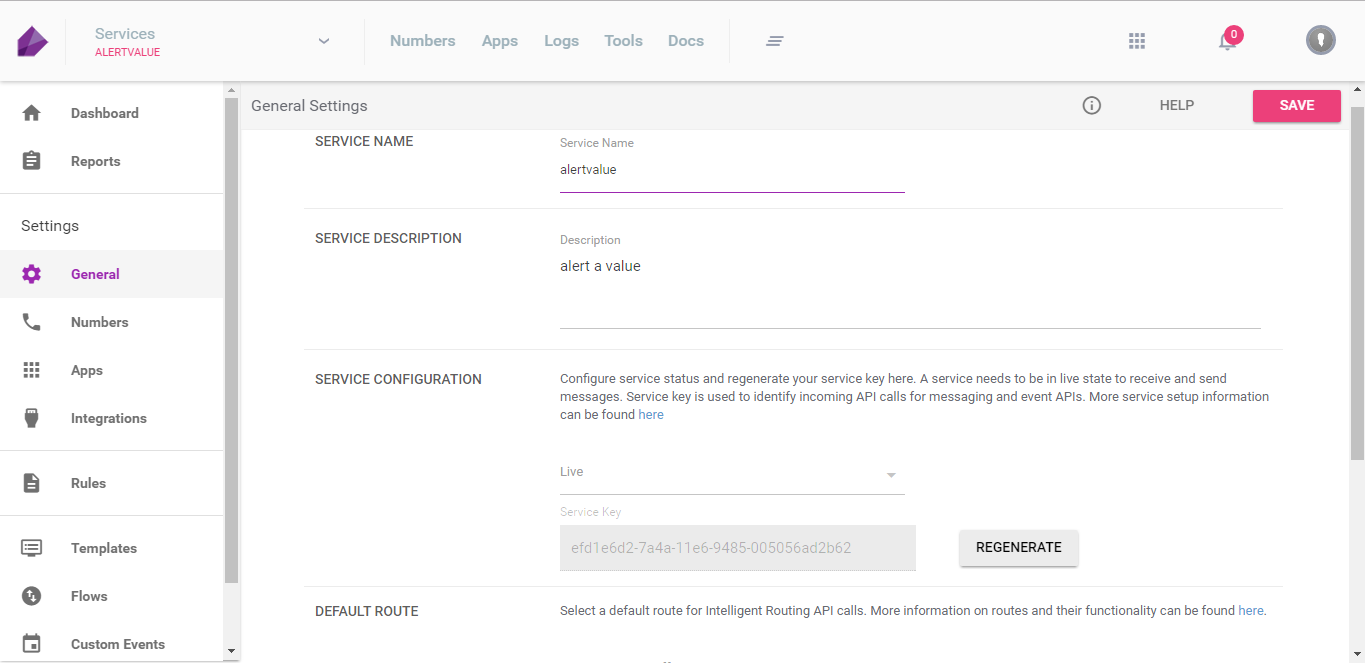
For more information on service configuration, see here.
3. Make an API request
To send an SMS, make an API request using Postman or Hurl.it.
Below are the details of the API with sample request and response formats.
Request
If your IMIconnect web access URL is on a .io TLD, then you should use the API end point with .io. For example, if your domain is
mycompany.imiconnect.com, then your API base URL will beapi.imiconnect.com. Whereas, if your domain ismycompany.imiconnect.io, then your API base URL will beapi.imiconnect.io.
| URI | https://api.imiconnect.com/resources/v1/messaging |
| Method | POST |
Request Headers
| Request Header | Desctiption |
|---|---|
| key | Service Key generated using IMIconnect |
| content-type | application/JSON |
Request Body
Examples
//Simple SMS
{

  "deliverychannel":"sms",
   "channels":{
     "sms":{
        "text":"Sending first SMS using IMIconnect",
        "senderid":"<purchased sender ID>"
     }
   },
    "destination":[
     {
        "msisdn":["<phone number with country code>"]
     }
  ]
}
//SMS with Smartlink
{
  "channels":{
    //Smartlink array must be available to replace {{link_<linkid>}} information in this  channel.
      "smartlinks":[
        {
            "linkid": 5,
            "validity": 30
        }
      ],
    "sms":{
      "type":1,
      "text":"Sending first SMS with smart link using IMIconnect. Click the link to get surprise gift {{link_5}}",
      "senderid":"DEMOBK"
    }
  },
  "destination":[
     {
        "msisdn":["<phone number with country code>"]
     }
   ]
}
//Simple SMS including optional parameters
{
  "correlationid":"sgh3tvk",
  "notifyurl":"https://mywebsite.com/record/transactions",
  "notifydata":"kopwest4kfr",
  "expiry":"2015-04-12T18:51:19",
  "priority":"2",
  "deliverychannel":"sms",
   "channels":{
     "smartlinks":[
        {
            "linkid": 5,
            "validity": 30
        }
      ],
     "sms":{
        "text":"Sending first SMS with smart link using IMIconnect. Click the link to get surprise gift {{link_5}}",
        "senderid":"DEMOBK"
     }
   },
    "destination":[
     {
        "msisdn":["<phone number with country code>"],
        "correlationid":"sgh3tvkpert"
     }
  ]
}
//Simple SMS with variables
{

  "deliverychannel":"sms",
   "channels":{
     "sms":{
        "text":"$(name) $(email)",
        "senderid":"DEMOBK"
     }
   },
    "destination":[
     {
        "msisdn":["<phone number with country code>"]
     }
  ]
}
//You can send up to 1000 destinations in a single API request.
[{
        "deliverychannel": "sms",
        "channels": {
            "sms": {
                "text": "Hi John, Greetings from MNOP bank. "
            }
        },
        "destination": [{
            "msisdn": ["<phone number1 with country code>"]
        }]
    }, {
        "deliverychannel": "sms",
        "channels": {
            "sms": {
                "text": "Hi Mark, Greetings from MNOP bank. "
            }
        },
        "destination": [{
            "msisdn": ["<phone number2 with country code>"]
        }]
    }, {
        "deliverychannel": "sms",
        "channels": {
            "sms": {
                "text": "Hi steve, Greetings from MNOP bank. "
            }
        },
        "destination": [{
            "msisdn": ["<phone number3 with country code>"]
        }]
    }

]
//Sending SMS with a Template
{
    "correlationid": "",
    "conversationid": "",
    "callbackData": "",
    "notifyurl": "",
    "route": "",
    "expiry": "",
    "deliverychannel": "sms",
    "message": {
        "template": "1"

    },
    "channels": {

        "sms": {


        }

    },
    "destination": [{

        "msisdn": ["<phone number with country code>"]

    }]
}
Response
{
  "response": [
    {
      "code": "1001",
      "description": "Queued",
      "transid": "f9793c83-f0b7-4200-99d9-20111c507baf",
      "correlationid": "cid"
    }
  ]
}
If the API request is successful, you will receive a response with description-queued. A sample response is shown above. The message is delivered after few seconds.
For more information on parameters within the API and response codes, click here.
Now you have learnt how to send an SMS using IMIconnect. The below sections are optional.
4. Configure Message Receipts (Optional)
To receive a message receipt, you have to configure DR notify URL under your service
Settings > General. When the message is delivered, IMIconnect will notify the delivery report to the configured URL.
The format of the DR notification for SMS is shown in the sample code below.
{
    "deliveryInfoNotification": {
        "deliveryInfo": {
            "deliveryChannel": "SMS",
            "Description": "Delivered",
            "destinationType": "msisdn",
            "timeStamp": "2016-07-20T17:13:17.908",
            "code": "7500",
            "deliveryStatus": "Delivered",
            "destination": "911111111111"
        },
        "correlationid": "4eef-92ca-79fd0250c4a3-262895e4-2217",
        "callbackData": "return callbackdata",
        "transid": "262895e4-2217-4eef-92ca-79fd0250c4a3"
    }
}
5.Configure Incoming Message Notification (Optional)
To receive a notification for an Incoming Message from IMIconnect, you have to configure MO notify URL under your service Settings > General. A notification is sent to the configured URL when the message is sent by an end customer to a Short code or a Keyword that is configured in IMIconnect.
The format of MO notify URL is shown below.
{
    "userId": "$(customerId)",
    "channel": "SMS",
    "da": "$(service_code)",
    "oa": "$(msisdn)",
    "message": "$(actual_message)",
    "tid": "$(tid)",
    "datetime": "$(datetime)",
    "ts": "$(ts)"
}
Updated almost 3 years ago