SOAP API Node
Integrations allow the users to connect with an application using SOAP API. Each API integration is available as a node in the workflow under the defined category.
Configuring a SOAP API node
Request Details
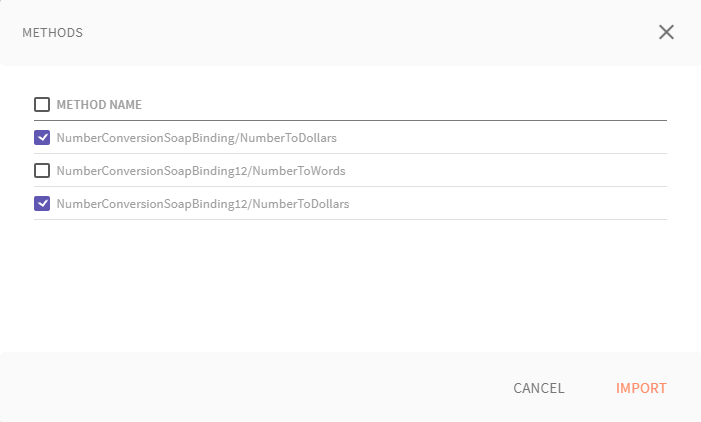
- Enter the WSDL URL or browse for the WSDL file and click PARSE.
(A pop-up window with available methods is displayed.) - Select the methods you want to configure in the node and click IMPORT
The selected methods are listed on the left side of the page. Click and configure each method to use them in the node.


a. Enter the Request Name for the Method.
b. Enter Request timeout and connection timeout time( in milli sec)
Authorization
Authorization has a list of authorization type to manage the API requirements. Choose an authorization type and configure the authorization details.
NO AUTH
Select this option when you don’t need an authorization parameter to send a request.
BASIC AUTH
Basic Auth requires a verified username and password to access a data resource. you can either use the static parameters or dynamic parameters for authorization.
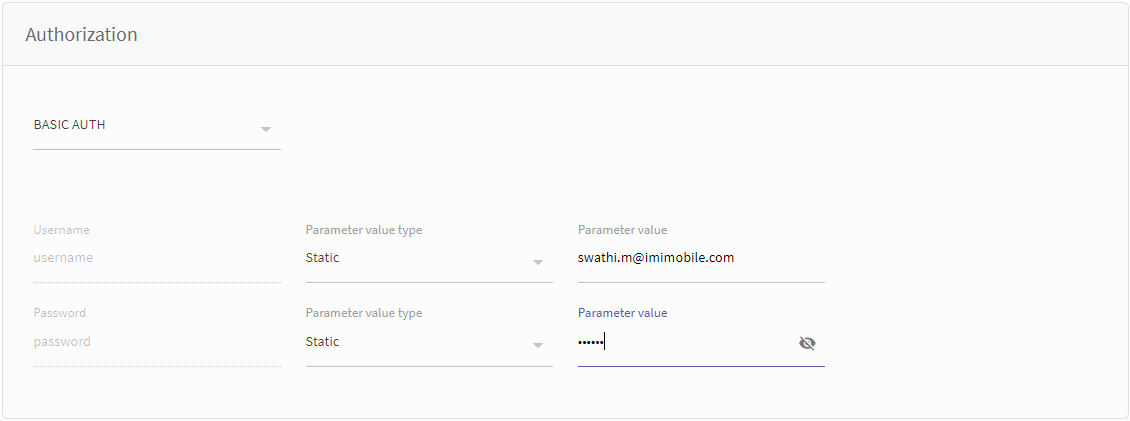
| Field | Description |
|---|---|
| Username/Password | User Name and password for authorization |
| Parameter Value Type | Static: When selected, you need to enter the value of the request parameter Dynamic: When selected, the request parameter is available in the node UI to configure the parameter and this parameter will accept input in the runtime. |
| Field name/Parameter value | Option is determined by selection of 'Parameter value type' Static = Parameter value : Enter the static value Dynamic= Field name: Enter the field name to display at the runtime. |
Security Configuration (Switch)
By default, the security configuration is switched off. Turned on to configure security certificates
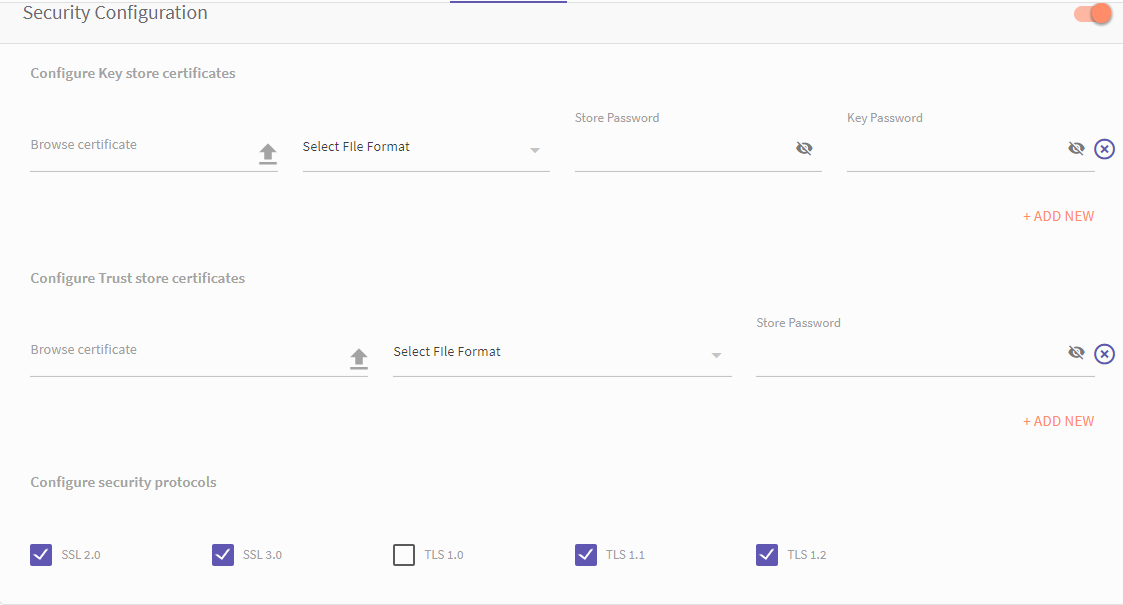
Configure security protocols
Checkmark the security protocol that applies to the security. You can select more than one security protocol
| Security Protocol | Description |
|---|---|
| SSL. 2.0 | In SSL 2.0, the client can only initiate a handshake at the beginning of the connection |
| SSL 3.0 | SSL 3.0 improved upon SSL 2.0 by adding SHA-1–based ciphers and support for certificate authentication. |
| TLS 1.0 | TLS 1.0 protocol to perform transaction. |
| TLS 1.1 | TLS 1.1 protocol to perform transaction. |
| TLS 1.2 | Use TLS 1.2 protocol to perform the transaction. It is the current version of the protocol. |
Headers
You can add parameters that are required to be sent as headers in the request or leave it to default in case if there is no change in the header values.

| Field | Description |
|---|---|
| Parameter | Header Parameter. |
| Parameter value type | Static: When selected, you need to enter the value of the request parameter Dynamic: When selected, the request parameter is available in the node UI to configure the parameter and this parameter will accept input in the runtime. |
| Field name/Parameter value | Option is determined by selection of 'Parameter value type' Static = Parameter value : Enter the static value Dynamic= Field name: Enter the field name to display at the runtime. |
Body
In the request body, the selected method is displayed in XML format. you can select the desired variables and replace it with $(variable name) to accept parameters at the runtime.
a. Click PARSE to list the parameters of the request body.
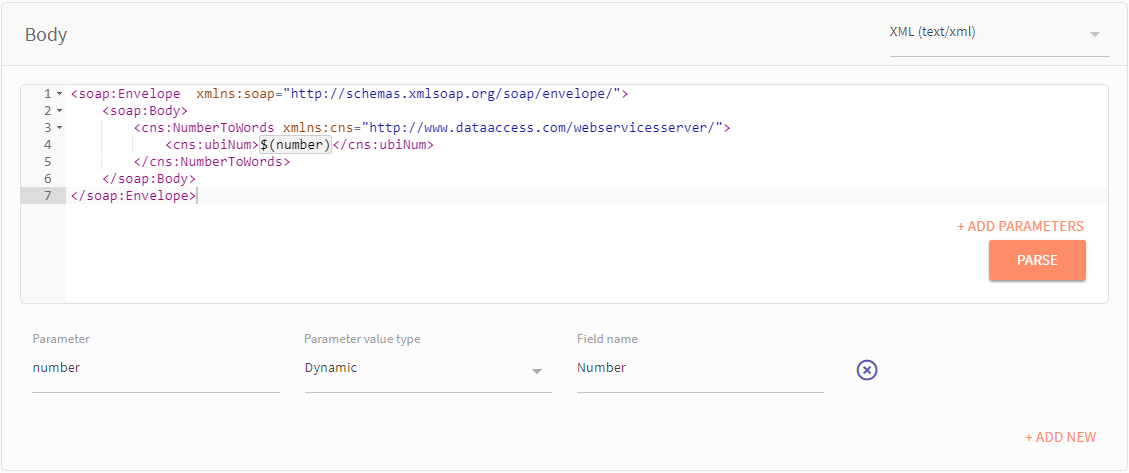
b. Configure the variable
(Select the variables by putting the desired variable as $(var).)
Configure the parameters
| Parameter | Body Parameter. |
| Parameter value type | Static: When selected, you need to enter the value of the request parameter Dynamic: When selected, the request parameter is available in the node UI to configure the parameter and this parameter will accept input in the runtime. |
| Field name/Parameter value | Option is determined by selection of 'Parameter value type' Static = Parameter value : Enter the static value Dynamic= Field name: Enter the field name to display at the runtime. |
Response - Configure node events
Node event can be created by importing the response paths from the sample response. Each response has to be mapped to a node edge by specifying the path of the status code/response object and the node edge from the drop down provided.
a. Select the response type from the drop-down menu
b. Browse to the copy the sample response for the URL,
c. Click import from sample to enter sample response and to configure the request.
- In the 'Sample JSON pop up windows, paste the sample JSON code in JSON data text box and click Parse.
- Parameters and value list is displayed for selection.
- Select the required parameters and click import to import parameters into the body.
d. Configure node events by selecting the required details from the drop-down value provided.
- Click 'Add' to add node events, as per the requirements.
e. Set data to be returned in flow session
These parameters are available under the RESPONSE tab in the node and can be mapped to a session variable in the node. For more information, see Mapping session variables
- Parameter Name: Name of the node Variable.
- Set condition on: · Drop-down(body parameter/HTTP response/Header) which allows you to select reference path i.e, body parameter/HTTP response/Header
- Response path: ·Path of the object mapped to the node edge
f. Click Save to save the current configuration.
Note: You can add as many methods as you want for the node.
Setting up NODE UI
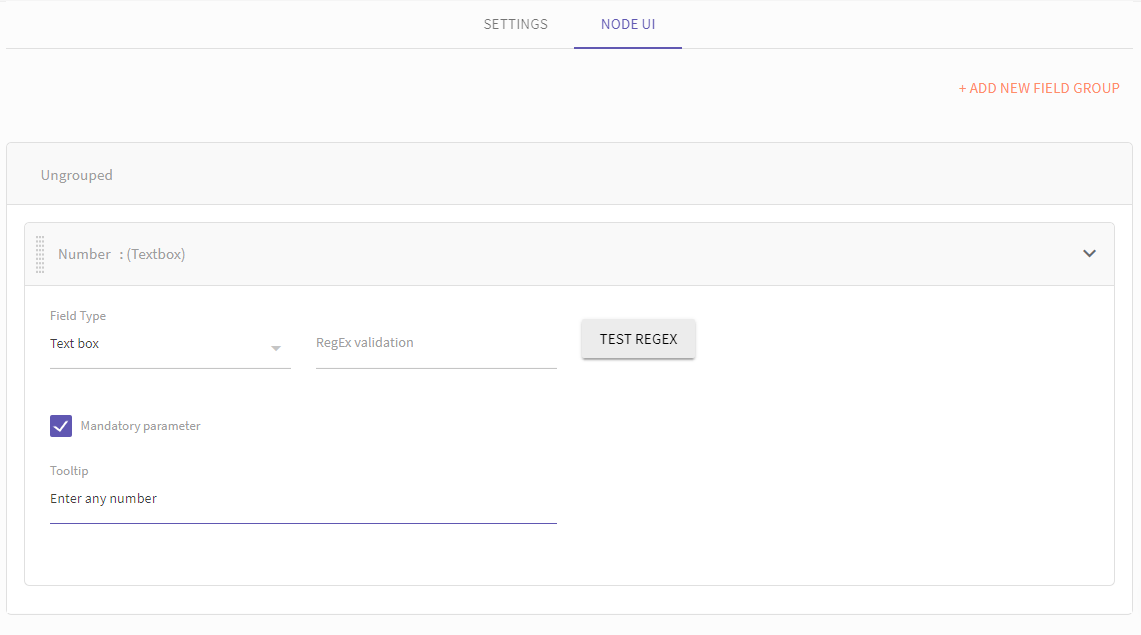
The Node UI tab allows you to configure the ‘Dynamic’ parameters which are defined in the API. Initially, all the parameter are grouped under ungrouped section. you can define new groups and
add parameters from the ‘Ungrouped’ group by dragging the same to the ‘GROUP 1’(the group name can be changed by clicking the edit button).
| Field Type | Description |
|---|---|
| Textbox | on selecting text box field type user will need to specify Regex validation. Any expression added here will validate the parameter. If there is an error it will be mapped to the error edge .For example if parameter is supposed to be a mobile number in India and the mobile number entered does not start with “+91”, then the node should exit from error edge with an error message of “Parameter validation failed” and the concerned c |
| Selection Box | on selecting this field type user will need to add values, later from which the user can select in the node. |
| Date Selection | On selecting this user will need to specify the formats for date and time and the value can be entered in the node only in that format. |
RegEx Validation
Any expression added here will validate the parameter. If there is an error it will be mapped to the error edge. For example, if the parameter is supposed to be a mobile number in India and the mobile number entered does not start with “+91”, then the node should exit from error edge with an error message of “Parameter validation failed” and the concerned code.
ToolTip
When checked on, it displays the description of the parameter when you hover over the parameter.
Mapping session variables
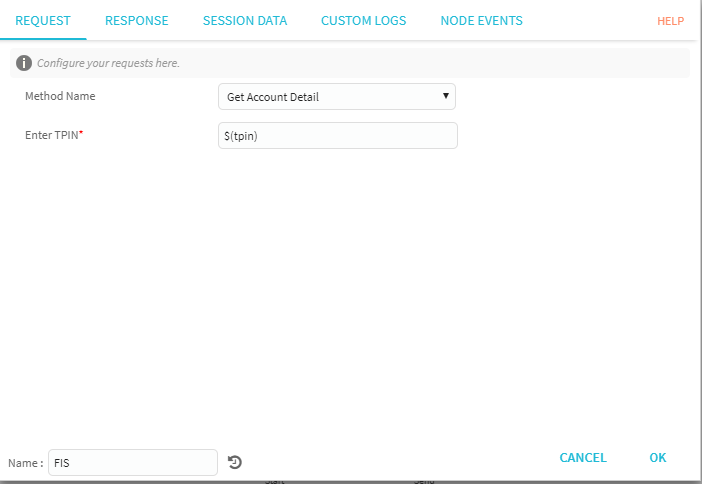
The dynamic fields are defined in the Body and configured in the Node UI. The response parameters are defined in Response section, under 'Set data to be returned in flow session'.
- On the flow canvas, when you click-open a custom node, all the dynamic variables are listed under the Request tab.
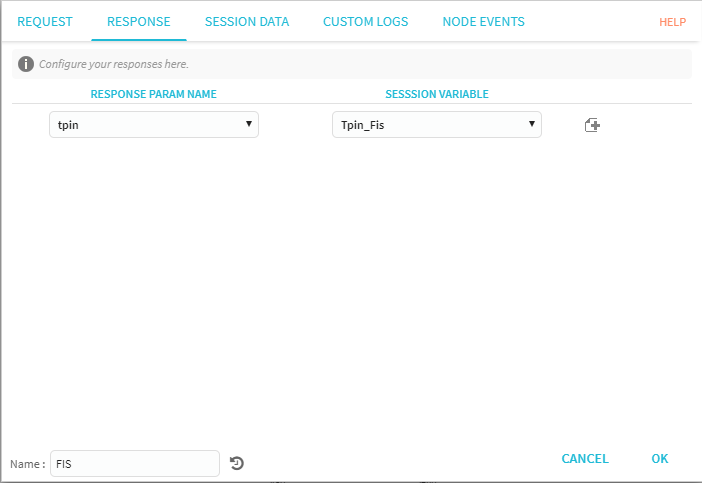
- Under the Response* Tab, you are required to map the Response parameters to Session Variable** to use it in the flow.
- Select a Response Parameter from the drop down and then select or create a Session Variable from the drop down.
- Click OK to save the configuration.
Updated about 3 years ago