Numbers and Apps
To setup IMIconnect platform, configure numbers and apps. Numbers are required to send and receive messages on telecom channels, that is, SMS and Voice. Apps are required to send and receive messages on IP channels such as, Real Time Messaging (RTM), Push, Facebook, Twitter, and WeChat.
All messages on IMIconnect are sent through a service. An administrator or a developer with appropriate permissions can create a service. Numbers and apps configured are mapped to a service before messages can be sent. The Admin, Developer, or an Asset Manager can allocate one asset per channel to a team/user within a service. Multiple Short codes, Phone Numbers, and Keywords can be allocated to a user within a service.
Following are the topics of this section:
- Short codes
- Phone Numbers
- Sender ID
- Keywords
- Mobile App
- Add a Mobile Application
- Configure iOS Platform
- Configure Android Platform
- Web Push Configuration
- Configure Chrome and Firefox
- Configure Safari
- Sharing of Channel Assets
Short codes
A Short code is a 5 or 7 digit number that is used to send and receive SMS.
Short codes are mostly useful for business groups that interact with customers through an SMS and expect to receive an SMS from their customers. A Short code allows you to send and receive large volumes of SMSes, using the same RESTful APIs as Long codes.
Short codes may be specific to one telecom service provider or common to all telecom service providers.
To get a Short code, Please reach out to the support team..
On successful request, the Short code is displayed on the numbers screen.
Note:
Short codes may not be available immediately, as it involves back end verification process with telecom service providers. The verification process may take up to two working days.
Phone Numbers
A phone number is a 10-digit number that is used to send and receive a Call or an SMS. You can buy phone numbers for 84 countries using IMIconnect. In case you cannot find the country of your interest, you can place an offline request with us.
To get a number, follow these steps:
-
From the IMIconnect menu, click Numbers . The numbers screen appears.
-
Click GET NUMBERS and select PHONE NUMBER.
-
Enter the name of the country and select the country name from the list that appears.
-
Click NEXT. The Buy Phone Number screen appears.
-
Select a number type from the options:
- Multi-Function: Capable to make Voice calls and/or send SMS.
- Landline: Capable to make Voice calls only.
- Mobile: Capable to send SMS only.
- Tollfree: Capable to make Voice calls and send SMS.
-
Number (Optional): Enter a preferred number combination. For example 456 or 999.
-
Click SEARCH. All the available numbers are displayed along with the monthly rental, inbound voice, and SMS rates.
-
Select the number from the list and click BUY. A confirmation screen appears.
-
Click CONFIRM AND BUY after verifying the details.
-
On the second confirmation screen, click CONFIRM to buy the number.
In case an address is required for purchasing a number for that country, an address form would be displayed to capture the information.
On successful request, the Phone Number is displayed on the numbers screen.
Sender ID
A Sender ID is the address from a SMS or text message can be sent. A Sender ID represents a meaningful word or brand of your business. These are useful to send hundreds of messages in few seconds and is used for one-way communication. The receivers cannot reply to a Sender ID.
Sender IDs are mostly useful for business groups that interact with customers through an SMS to promote their business.
To get a Sender ID, follow these steps:
- From the IMIconnect menu, click Numbers . The numbers screen appears.
- Click GET NUMBERS and select SENDER ID. The Sender Id request screen appears.
- Add the following details:
-
Desired Sender Code: Enter the Sender ID you wish to buy. -
Country: Enter the country name in which the Sender ID will be used.
- Click Submit.
On successful request, the Sender ID is displayed on the numbers screen.
Two-way conversations
If you want to engage in a two-way conversation with your customer over SMS, then you will need to buy a number and add the same as Sender ID including the country code. For example if the number you bought is +44771282790, then add 44771282790 as a Sender ID so that you can send messages from this number and your customers can respond
In some countries, governments and telecom service providers have placed restrictions on the SMS and Sender IDs. You can view the restrictions from IMIconnect menu > Tools > SMS RESTRICTIONS.
Keywords
A Keyword is a short text that is associated with a Short code, relative to businesses or campaigns reserved by an organization. If you already own a Short code, you can request any number of Keywords for that Short code. On the contrary, if you are interested in getting only a Keyword and do not already have a Short code, then you will be given a default Short code along with the requested Keyword. The default Short codes may be shared with other users of IMIconnect and are subject to availability.
For example, a bank can reserve a keyword as SAVINGS and Short code as 55555. The bank may ask the customers to SMS "Text SAVINGS to 55555" to receive a call on savings information. The SAVINGS keyword may also be requested by another bank without a Short code. IMIconnect will provide the requested keyword to the latter bank along with a default Short code.
To get a keyword, follow these steps:
- Login to IMIconnect.
- Click Numbers from the menu.
- Click GET A NUMBER and select KEYWORD.
- Enter the Desired Keyword.
- Select the Short code Type you wish to associate your Keyword. The options are:
- Vanity
- Random
- If you select Vanity, enter Desired Short Code.
- Choose the appropriate option from the Assign Random if desired short code unavailable drop down.
- Enter the following details:
- Email ID
- Company Name
- Mailing Address
- Primary Contact Name
- Primary Contact Number
- Service Name
- Service Website
- Is this an existing Website
- Service Content Details
A Keyword cannot be more than 50 characters and does not allow spaces.
- Click Submit.
On successful request, the selected Keyword is displayed on the numbers screen.
Mobile App
The IMIconnect iOS and Android SDKs provide a messaging framework for mobile app developers to integrate IMIconnect’s Real Time and Push messaging services into their mobile applications. The SDK also supports monitoring of device events. These events are reported back to IMIconnect and stored against the customer’s profile. These events are useful before sending messages to your customers.
For example, you may check the battery level before sending a message. You may ignore those customers whose current battery level is less than 5% while sending a message.
Add a Mobile Application
Before you add a mobile application, the following pre-configuration steps must be completed. The keys that are obtained from these steps are used to configure iOS, Android, and Web platforms.
To add a mobile application in IMIconnect:
- On the menu, click Apps. The Application screen appears.
- Click CONFIGURE APPS > MOBILE / WEB.

- Enter the application name and click NEXT.

- Select the Mobile or Web platform and click NEXT. Based on the selected platform, supported mobile OS or supported browsers screen appears.
- Select OS or browser and click NEXT. The respective app configuration screen appears.
- Follow the below links to configure mobile and web configuration:
- iOS
- Android
- Web Configuration
- Chrome and Firefox
- Safari
- When the configuration is complete, click SAVE.
A confirmation message is displayed when the application is created successfully.
Before registering customers through app, a master profile has to be created using Create Profile API.
Registering on Apple Business Register
Create an Apple Business Chat application
A Business Chat application is automatically created within IMIconnect when you register on the Apple Business Register to create a business chat account and choose IMIconnect as your service provider (CSP).
Registering on Apple Business Register
Before your business can offer Business Chat to its customers, you must register with Apple. You will then need to select an approved Customer Service Platform (CSP) during registration to use Business Chat.
To register for a new business account, follow these guides by Apple
Once your business account is approved, choose IMIconnect as your CSP platform

CSP Configuration
You will need an IMIconnect account to complete the linking process. Once successfully linked, you will find your business account under Apps in your IMIconnect account.
Note: If you do not have an IMIconnect account, you need to register for a free trial on IMIconnect.io and wait for the approval which takes about 2 hours on a business day.
Web Push Configuration
IMIconnect Web Push Notification feature allows you to send notifications to your customers' browsers, even when they are not on your website. The user must 'opt-in' and agree to receive notifications from your website. Once opted to receive notifications, your customers can receive notifications even when the browser is closed. Web Push notifications are supported only on HTTPS sites.
Some advantages of Web Push:
- You can send push notifications to your customers without having any contact details.
- Your customers can receive push notifications even when the browser is closed.
- You can send push notifications to those customers that are not on your website.
Web push notification examples:
- A bank can notify customers about their payments.
- A notification can be sent when a particular request or process is complete.
- A sports or news website can send timely updates to its subscribers.
Web push notifications are not supported in private browsing mode.
Web push notifications are supported on the following OS and browsers:
| OS | Chrome | Firefox | Safari |
|---|---|---|---|
| Windows Desktop (Version 7 ,8 ,10) | Yes | Yes | No |
| Mac OS X 10.11 (EI Captain) | Yes | Yes | Yes |
| Linux (Fedora 24) | Yes | Yes | No |
| iOS (9.x) | No | No | No |
| Android (5.x) | Yes | No | No |
Click here to view the step-by-step instructions to configure Webpush platform.
Facebook
Prerequisites to create Facebook asset :
The client must have,
- A Facebook account. If not, create a user account with Facebook.
- A Facebook page. The page should also be created with the same account. To create a Facebook page, click create a page on Facebook.
Adding Facebook Asset to IMIconnect
- Login to IMIconnect with valid credentials.
- On the main menu, click Apps . The Apps page is displayed.
- Click CONFIGURE APPS and select FACEBOOK.
- Enter a name to identify the Facebook channel and click Next.
If you are already logged into Facebook on your computer, all the Facebook pages available in your account are displayed. If you are not logged in, an authentication screen appears to enter username and password. - Assuming that you are already logged into Facebook, select the Facebook page and click NEXT. The Facebook is now configured to IMIconnect. Already configured pages cannot be selected.

Facebook page details
| Field | Description |
|---|---|
| PAGE Name | Name of the Facebook Page that is configure to manage by IMIconnect |
| AUTHORIZED BY | The individual who created the page. |
| ADDED BY | The individual who configured the page to IMIconnect. |
- Configure the Advance setting(optional) settings:

Option | Description |
|---|---|
Messenger Plugin | Two plugins Send to Messenger and Message Us Plugin are provided. You can use these plugins on desktop and mobile web to access Facebook Messenger.
Follow these steps to add plugin in your desktop and mobile web:
|
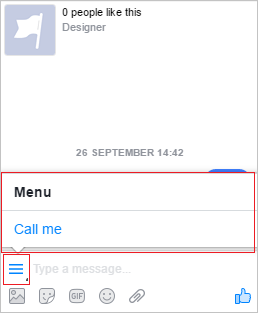
Welcome Screen | A welcome screen is displayed when a user visits your Facebook page for the first time. You can also configure Get Started button for users to start a conversation. To configure Welcome screen and Get Started button, follow these steps:
When a user visits your Facebook page, a welcome message and a Get Started button is displayed. When users clicks on the Get Started button, a postback event is triggered to IMIconnect with the payload that is configured. You can configure a rule and a subsequent action based on the payload such as sending a thank you message for visiting the page. |
Persistent Menu | A persistent menu is a menu that appears next to the message typing screen. The menu can hold up to 5 menu items that can be configured to perform an action such as open a URL or add a payload. To configure persistent menu, follow these steps:
When a user visits the page, a menu appears next to the message typing screen. |
| Download messenger code | Click to download the messenger code. It can be used to redirect to the Facebook page on scanning the code from the messenger. |
Twitter
Login/Create Twitter Asset
- Login to a Twitter Account; If you have not registered, Sign up to create a Twitter profile.
- From Profile and settings, select Security and privacyand choose Privacy and safety Scroll down the page and enable Receive Direct Messages from anyone option.

- Click Save changes. Now your twitter account can receive messages from anyone.
Adding Twitter asset to IMIconnect Platform
- Login to IMIconnect.
- Click Apps from the menu. The Apps screen is displayed.
- Click CONFIGURE APPS and select TWITTER
- Enter the Name of the Twitter App you are creating and click Next

- Under Twitter Application Details, click ADD TWITTER ACCOUNT
The page is navigated to twitter official page and requests for App authorization. - Enter the Twitter handle details and click Authorize App


- IMIconnect is now configured to receive and send Twitter messages.

Twitter Application Details
| Field | Description |
|---|---|
| Account Name | Twitter account name |
| Twitter Handle | Twitter account handle code |
| Added by | Name of the user who created this Twitte assedt into IMIconnect. |
| CHANGE TWITTER ACCOUNT | Click to remove the current Twitter account. |
Advance Settings
| GET CODE | Click to get the Plugin code to use it with a Twitter button. |
| CONFIGURE (Welcome Screen) | Click to configure a welcome screen in a chat window.This welcome message is displayed, when a user clicks on the Twitter button to start a chat for a very first time. |
| Write the welcome message here. | Enter the welcome message that you want to display to the user when the chat window is open for the first time. |
| Attachment Type | Select an attachment type you want to display in the chat windows. |
| Attachment URL | Enter the URL of the attachment type you have selected. |
| Configure Quick Replies (toggle switch) | Switch on to configure Quick Replies in the chat window. |
| Label | Enter the label of the quick reply. |
| Description | Add a description to the quick reply. |
| MetaData | Metadata of the quick reply. |
| ADD MORE OPTIONS | Click to add another quick reply option. |
WeChat
WeChat restricts the official accounts to initiate an interaction. An inbound message from customers is mandatory before sending a WeChat message. WeChat also limits the official accounts to push messages only within 48-hours of the incoming message from the customers. The limit extends by 48-hours when a new message is received from the customer.
Prerequisites for WeChat Asset Configuration
Follow these steps to create assets on WeChat:
- Go to Wechat and create an Account.
- Navigate to Developer Center and make a note of the following. These are used in IMIconect to configure WeChat.
- AppID
- AppSecret

WeChat Asset Addition
- Login to IMIconnect.
- Click Apps from the menu. The Apps screen appears.
- Click CONFIGURE APPS and select WECHAT.
- Add the following details in the screen that is displayed:
WeChat Official Account Details
- App ID: Enter App ID that is generated in the WeChat website.
- App Secret: Enter App Secret that is s generated in the WeChat website.
Configurations in WeChat Official Account
- Make a note of the CALLBACK URL AND CALLBACK TOKEN. These are used in WeChat OA settings in WeChat website.
Customer on-boarding setting (Optional)
- Enter a Keyword to on-board a customer. The default keyword is #start.
- From the drop-down Select Unique Identifier.
- Enter a Keyword to off-board a customer. The default keyword is #stop.
- From the drop-down Select Unique Identifier.
- Select Sender Id from the drop-down. The Sender ID is used to send OTP to on-board a customer.
- Click Save.
A confirmation message appears when the application is created successfully.
The auto-generated call back URL and token for every asset must be configured in the ‘server settings’ within the developer section of the WeChat official admin portal.
Sharing of Channel Assets
Any users with the role as Admin, Developer or Asset Manager can allocate the added assets to a specific group, where all the teams or a team within the group can use the asset within their services. Only apps can be allocated to groups and teams.
To allocate an asset to a group or team, follow these steps:
- After you create an asset, click MANAGE against the asset.

- The manage screen appears. Scroll down the page and select appropriate option.
- Share to a group only: Select this option to share an asset to a group.
- Share to a team: Select this option to share an asset to a team within a group.
- Share to all groups and teams: Select this option to share an asset to all groups and teams.

- To share an asset to a group, select Share to a group only. The ADD NEW is enabled.
- Click ADD NEW and select the group name from from the drop-down. To share the asset to all teams within the group, select the checkbox "Share to all teams under this group".
- To share an asset to a team, select Share to a team. The ADD NEW is enabled.
- Click ADD NEW and select the group name and team from from the drop-down.
- Click UPDATE.
RTM
RTM is a high performance IP messaging platform that powers the messaging capabilities on the RTM channel exposed on IMIconnect. Clients are provided with Android / iOS SDKs to facilitate two-way messaging between the SDK embedded applications installed on their customer handsets and the RTM gateway of IMIconnect.
Key components of the RTM gateway include:
- MQTT Broker: A cluster of MQTT Broker Nodes responsible for distributing messages between RTM Apps and IMIconnect services via RTMS.
- Application Server: Webserver used for hosting RTMS admin web console and HTTP(S) REST API exposed by RTMS for RTM SDK, OTT APP call-back and IMIconnect.
- OTT handler: A set of modules used by Processors (MO / MT and DR) to interface with OTT App provider API and normalize OTT specific messages to RTMS message format. The RTM gateway processors comprise of the following:
-- MO processor - Configured to process and dispatch MO messages to IMIconnect MO queues. All transactions are logged in RTMS database.
-- MT processor - Configured to process and dispatch MT messages to MQTT brokers and OTT Handlers. All transactions are logged in RTMS database.
-- Retry processor - Configured to process and dispatch failed MT messages (stored on Queues by MT processor) tagged for retry to MQTT brokers and OTT Handlers. The number of times to retry and time interval between retry are configurable. In case all retry attempt fails, a message will be stored in IMIconnect DR queue with failed status and reason code.
-- DR processor - Configured to process and dispatch DR messages (stored on Queues by MQTT
broker and OTT handler) to IMIconnect DR queue. It also updates RTMS MT transaction logs with status delivered. Expiry Monitor in DR processor periodically query RTMS MT transaction logs for messages with expiry time did not receive DR message, for each of this message it update the transaction logs as expired and store a message in IMIconnect DR queue with status expired. - Queues: A cluster of Message Queue nodes with high availability responsible to store messages in queues for being picked up the Gateway processors (MO/MT/DR/Retry Processors).
- Application profile: Must be created prior to any message exchange between RTM App and IMIconnect services via RTMS. For each application profile, a unique AppId is generated and a profile is created in RTMS database. RTMS uses profile manager API to create a separate collection to store customer’s attributes on boarded via RTM App. All message exchanges via RTMS mandatory include AppId attribute. RTMS provides two interfaces to create and manage Application profiles.
Threads
A stream is used to route messages from customers to one service (one stream, per service), which limits the conversations that can be established on multiple threads via the same service.
For example, if a customer sends a message for a credit card query and another message for account settings related query, both the messages will be received on IMIconnect via the same stream. It is not possible to route the messages to two different support agents. In order to overcome this problem, a thread ID is used for all incoming and outgoing messages to identify which conversation that particular message is a part of.
Application developers can use this combination of thread and conversation stream, to segregate the messages into conversation view within the application.
Conversation Streams
Only one conversation stream can be added to a service, but the same stream can be used in multiple services.
Device Sync
All outbound messages from IMIconnect are sent to the devices that are registered with a destination user ID, but the incoming messages and the message receipts are not synced across user's devices.
Topic Based Messaging
In order to sync all incoming messages and message receipts received from a device, all the subscribed user IDs will receive the message that have the destination type as topic.
Announcements and Conversations
An RTM message is disintegrated into two thread types:
- Announcements: These messages are one-way and they do not expect a customer's reply.
- Conversations: These messages are two-way, which means that the customer can send a reply.
Both announcements and conversations can be delivered to a topic.
Updated over 3 years ago