Set-up a new mobile/web app asset on imiconnect 4.x
In order to use Push notification and in-app messaging features, you first need to create an app on the imiconnect platform. This app holds information like the FCM API key corresponding to your mobile app. In return, you get an App ID and a client key, which needs to be embedded in your mobile app to link it to the app created on imiconnect.
Further to send push notifications or in-app messages, you need to map this app asset to a service.
Note
Your account administrator should have been provided a URL to the imiconnect Portal, this URL is unique to your account. If you do not have your account URL, please contact your account administrator.
Create a Mobile App Asset in imiconnect
- Login to your imiconnect Portal account using your unique account URL.
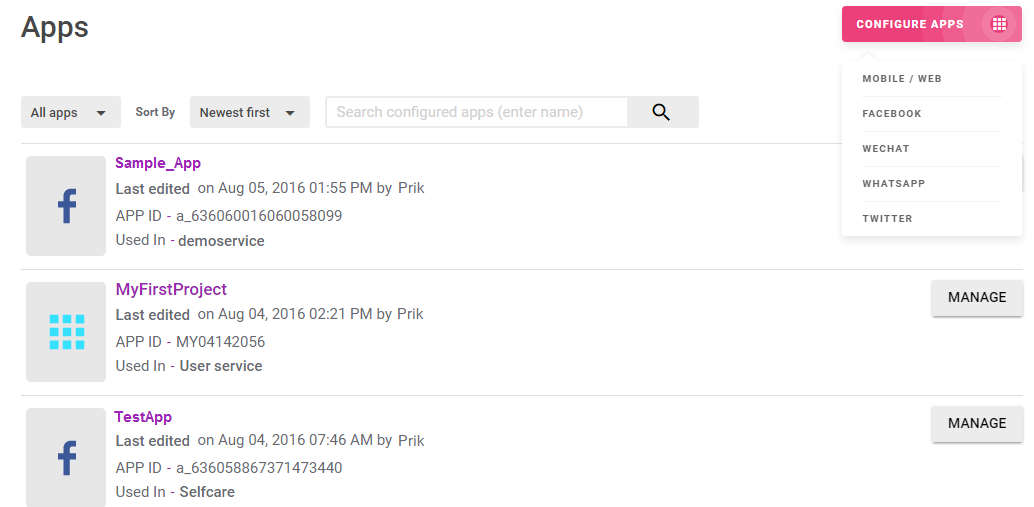
- From the menu, click Apps.
![]()
- Click CONFIGURE APPS > MOBILE / WEB.

- Enter a name for your application and click NEXT.

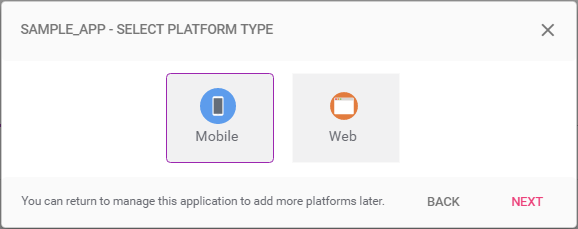
- Select 'Mobile' and click NEXT.

- Select the Android platform and click NEXT.
- The Android platform-specific features are displayed. Enable the features that you wish to use and configure the settings as appropriate:
Feature | Settings |
|---|---|
Real-time messaging | Configure the following:
Note: The RTM Transport and Security settings are common for all the configured platforms of the app. If you set for one platform, the same is applied to all other platforms. Transport protocols Security settings Enable RTM payload encryption to encrypt the RTM payload in transit. |
| Push notifications | Enter your FCM Server key within the Push notifications settings box. |
| Two factor authentication | Select the Sender ID through which an OTP (One Time Password) is sent. |
| Device attributes | To monitor different attributes such as Time Zone, IMEI, RAM, Location and so on. |
![]()
- Click SAVE.
- Make a note of the Client Key. This will be used while integrating the imiconnect SDK within your application.
- Click SAVE.
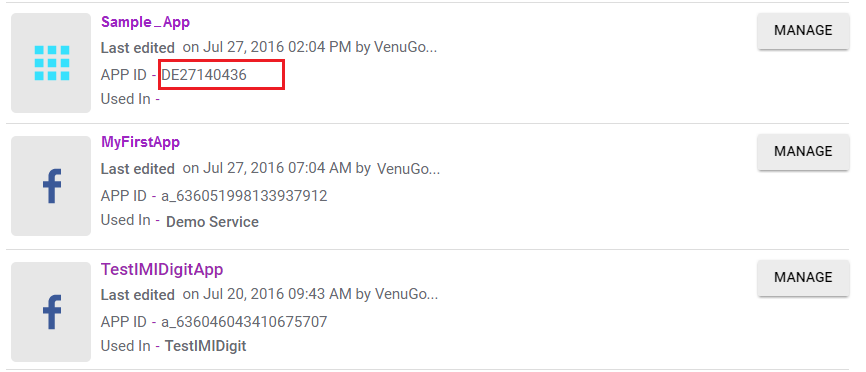
An overview screen will appear with the newly created application profile and the corresponding App ID.

- Make a note of the App ID. This will be used while integrating the imiconnect SDK within your application.
To configure a project, visit Project Setup
Create a Web App Asset in imiconnect
- Login to your imiconnect Portal account using your unique account URL.
- From the menu bar, click Apps as shown below.
- Click Configure Apps > Mobile/Web.
- In the Enter Application Name dialog box, enter the name for the application and click Next.
- Select the platform type as Web from the Sample_App-Select Platform Type dialog box and click Next.
- Select the required browser from the Sample_App-Select Browser and click Next.
The further steps depend on the browser you select. - To configure click Google Chrome & Firefox browsers .
a. Select Push Messaging or Real-Time Messaging channel.
b. Enter the following fields to configure Chrome and Firefox browsers:
i. Site URL: Enter the URL of the website to configure Web Push notification.
ii. API Key: Enter the API key generated in the section Setup FCM for Chrome and Firefox Browsers
iii. Project number: Enter the project number generated in the section Setup FCM for Chrome and Firefox Browsers
iv. Web API: Enter the Web API key generated in the section Setup FCM for Chrome and Firefox Browsers
v. Notification Icon: Enter the path of the notification icon. The size of the icon should be 80x80.
c. Click Save.
To configure Safari Browser, click Apple Safari and click Next.
Enter the following fields to configure Safari browser:
a. Select Push Messaging or Real-Time Messaging channel.
b. Site Name: The name that is entered is displayed on the notification.
c. Site URL: The URL that is used to validate the identity of the website requesting push notifications using your ID. Only the website that matches the URL can use your imiconnect ID for push notifications.
d. APNS Credentials: Upload the .p12 certificate. Enter the password that is set while generating the certificate in the section Setup APNS for Safari Browser. Leave this field blank if the certificate was generated without a password.
e. Notification Icons: It is mandatory to upload all six icons. Click the respective buttons to upload the icons.
8 Configure RTM's Transport and Security settings.
| Feature | Settings |
|---|---|
| Real-time messaging | Transport protocols Two transport protocols are available for establishing RTM connection with imiconnect. They are Web Socket and MQTT. You can configure them as primary and secondary. In case the connection is not established on the primary protocol, it will fall back to secondary protocol. Security settings Enable secured ports to establish RTM connection on the secured port for MQTT and WebSocket as an extra layer of security. Enable RTM payload encryption to encrypt the RTM payload in transit. |
- Click Save.
You will be re-directed to the Web Configuration page to download the app.
Download and Integrate JavaScript SDK
- When the web app is added successfully, you can notice a DOWNLOAD link under Web configuration section. Click the link to download the JavaScript SDK.
- Extract the zip file, to a location on your local computer. You will notice js, manifest folders and sw.js file.
- Copy sw.js file, js, and manifest folder to the root folder of your web application.
- Copy the below code and paste it in the header or body of your default web page. Replace appId with your actual value.
To see example of Web Push Popup, click Web Push Popup
Updated almost 3 years ago