Tools
The Tools menu provides supporting features that are required to work with IMIconnect. For more information on each feature, click the links in the table below.
| Features | Description |
|---|---|
| ANALYTICS | To view the analytical reports of the messages sent for different channels during the specified period. |
| API EXPLORER | To test the API request and response for the selected channel before using it in an API call. |
| CHANNEL TESTING | To test the outbound messages for the all channels. |
| DOWNLOADS | To download the SDK for Android and iOS platforms. |
| GEOFENCE | To create a geofence boundary and configure it with an app. |
| VOICE MEDIA | To upload a voice media file that can be used in voice flows. |
| SMS RESTRICTIONS | To view country specific restrictions for sending and receiving SMS. |
| NUMBER RESTRICTIONS | To view country specific restrictions for using phone numbers. |
| INTEGRATIONS | To view the integration with other products. |
| SMART LINK | To create and manage Smartlinks. |
Analytics
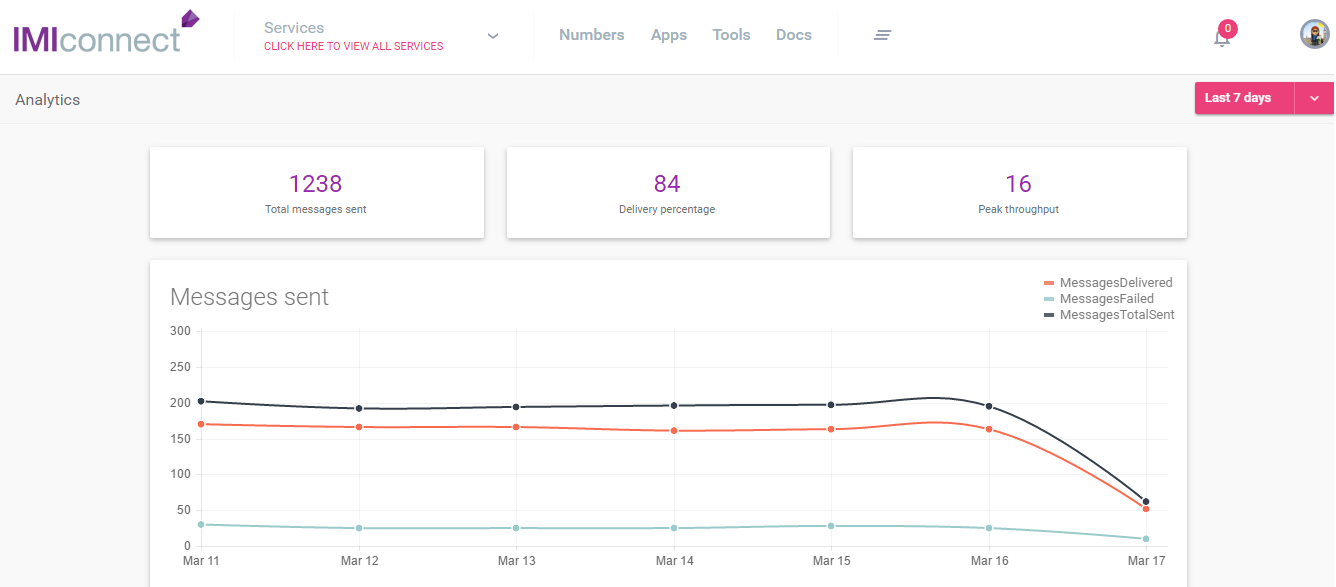
This feature allows you to view the analytical reports of all the services available to a group or team or client. A team can view the reports for the services that are available under the team. Only a client can view the reports of all the groups and teams that are available under the client.
To view the analytics, follow these steps:
- From the IMIconnect menu, click Tools > ANALYTICS. The reports are displayed for the last seven days.
- To change the time period, select the period from the drop-down.
You can view the following reports:
- Total number of messages sent.
- Percentage(%) of the messages delivered.
- Percentage(%) of the messages not delivered.
- A graph of the messages received that are originated by end customer.
- A report stating the all the reasons why the messages were failed.
- A report of the delivery type.
- Top inbound and outbound service.
- All the new services that are added for the specified duration.
- Average message delivery time for all the messages sent during the specified period.
- SLA reports for all the channels.
- Status of all the channels.
- API latency vs time for all channels.
- Issues observed on platform by support team.
- Incident history of all the channels.
API explorer
The API explorer is used to test the Messaging and Customer Profile API request and response before using it in an API call.
To test API request and response, follow these steps:
- From the IMIconnect menu, click Tools > API EXPLORER.
- By default the Messaging API screen appears.
To test Customer Profile API, click TRY CUSTOMER PROFILE API.
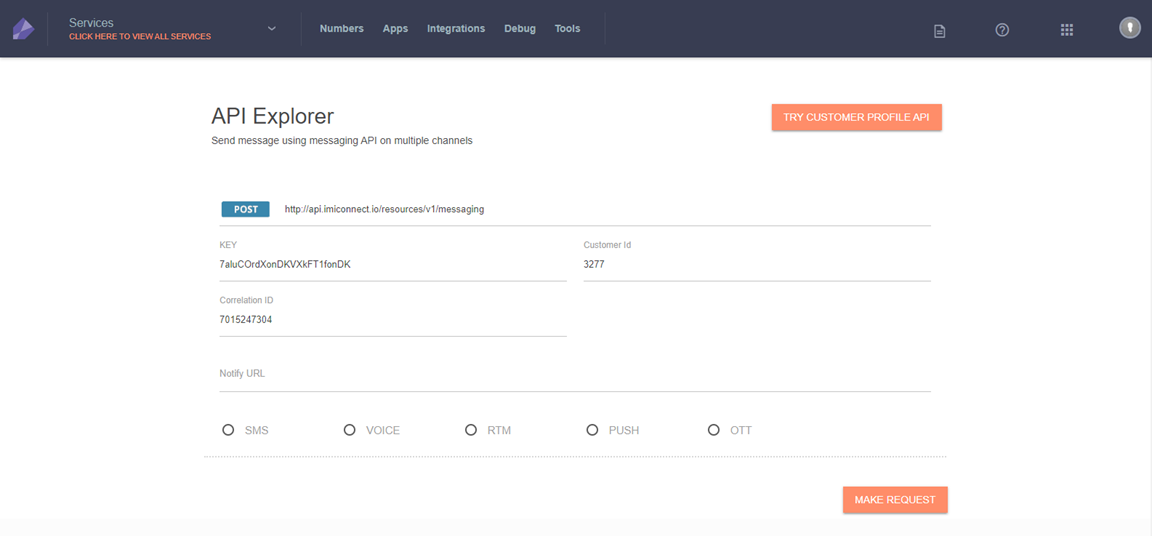
- Enter Notify URL to notify the message delivery. You can leave this empty if you do not wish to receive the notification.
- Select appropriate channel and configure the options. The options for each channel are:
Channel | Options |
|---|---|
SMS | Enter message body: Enter the message. |
Voice | Select voice flow: Select the voice flow from the drop-down. |
RTM |
iOS Extras
Android Extras
Windows Extras
Web Extras
To add interactive buttons to the notifications, enable the Add interactive buttons to this notification checkbox. |
Push | iOS
Android
Windows
WEB-PUSH For Chrome and Firefox browsers only.
|
OTT |
|
- After you have configured the channel, click MAKE REQUEST. The request and response is displayed.
A sample request and response for voice:
REQUEST
POST http://api.imimobile.com/resources/v1/messaging
{
	"message": {
		"parameters": {
			"services": "57"
		}
	},
	"notifyurl": "",
	"channels": {
		"voice": {
			"callflowid": "693",
			"cli": "4067642222"
		}
	},
	"deliverychannel": "voice",
	"correlationid": "9307012345",
	"destination": [
		{
			"customerid": [
				"423"
			]
		}
	]
}
RESPONSE
{
	"response": [
		{
			"code": "1001",
			"description": "Queued",
			"transid": "3740820a-4c3d-4d15-8995-6799310cb4ea",
			"correlationid": "9307012345"
		}
	]
}
Channel testing
This feature allows you to test the outbound messages for the selected channels.
Prerequisites
- A valid number/short code must be available on IMIconnect to send a message.
- A service must be created and configured with rules and flows.
To test channel testing, follow these steps:
- From the IMIconnect menu, click Tools > CHANNEL TESTING. The channel testing screen appears.
- Select Channel from the drop-down.
- Configure the options that appear associated with the selected channel.
- Click NEXT.
- Follow the instructions that appear on screen to make a voice call or send a message.
Downloads
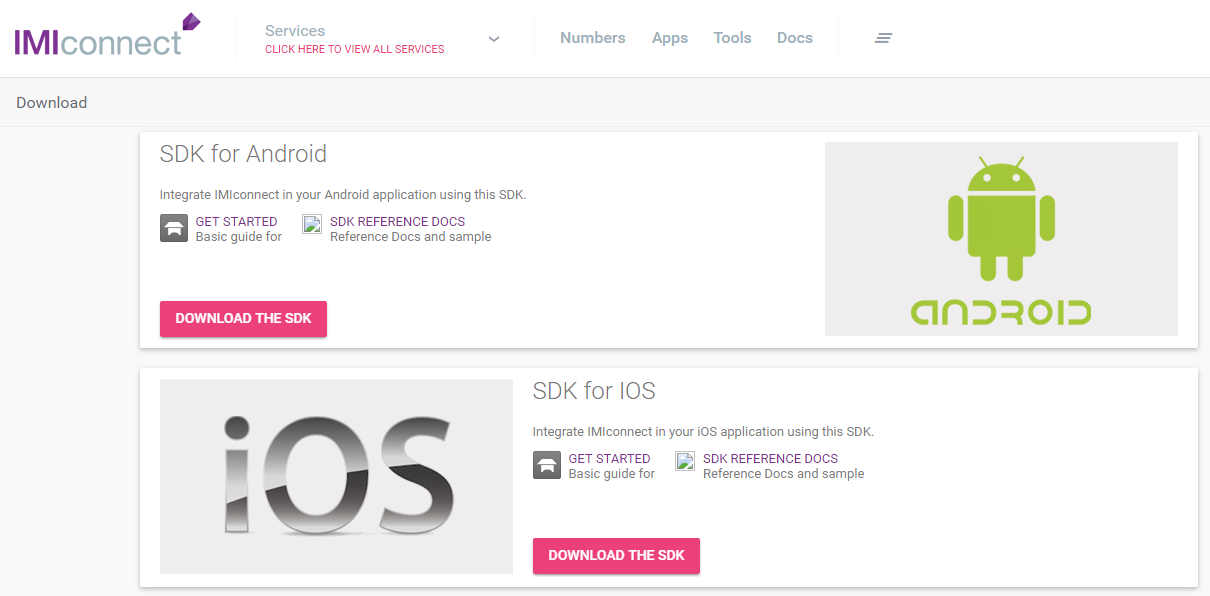
You can download the SDK for Android, iOS, Windows, and JavaScript.
To download the SDKs, follow these steps:
- From the IMIconnect menu, click Tools > DOWNLOADS. The SDK download screen appears.
- Click the appropriate SDK to download and integrate with your app.
Refer to respective quick start guides to integrate the SDK.
Geofence
Geofence is a virtual barrier for a location. You can create a geofence boundary and configure it with an app. This event operator reports a customer's location to IMIconnect through accurate GPS, when he/she enters an existing geofence. The geofence can be used in rules to trigger appropriate action.
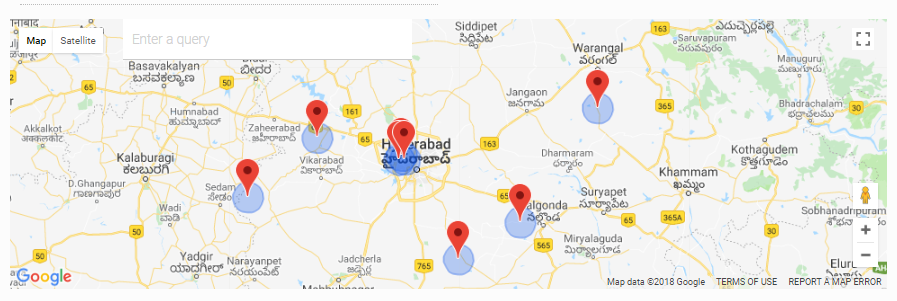
You can mark multiple geolocations by uploading geo-coordinates using a CSV file and also by manually pointing on the map ( search a location).
For Example: KFC is the designated geographical area which is also called as 'new location'.
Here in this scenario geo-enter would mean, as when the user enters into the KFC, which is a predefined geographical location from outside the fence i.e. old location. The client can set the reminder for the deals in KFC, when the customer entered into geo-enter (new location), the customer automatically gets the notification about the deals at KFC on his/her mobile device.
To add a geofence,
- On the IMIconnect menu, click Tools > GEOFENCES. The list of available geofence is displayed.
- Click ADD GEOFENCE.
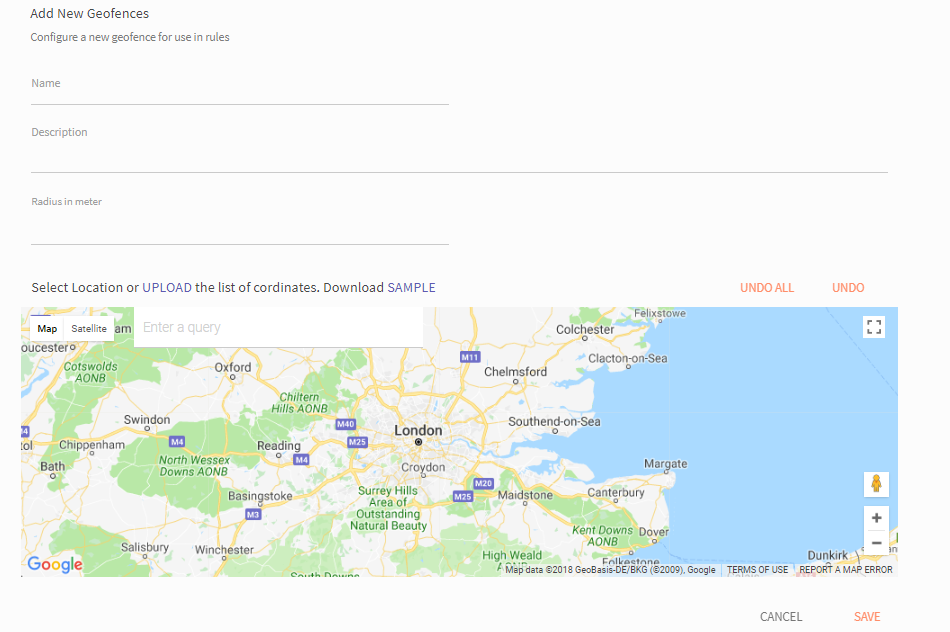
- Enter the following details to create a geofence barrier.
- Name: Enter a name for the geofence.
- Description: Enter a description for the geofence location for identification.
- Radius in meter: Enter the geofence area in radius. (Radius value in meters)
- Enter a query: You can search for a location using the search bar.
- You can manually create a geolocation by clicking on the map at the desired location.
- Upload: Upload the CVS file that contains the Geofence location coordinates.
( Click Sample to download a sample CVS file, you can use this file as a template to enter the coordinates of the geofence location.) - UNDO ALL: Click to clear all marked geolocations from the map.
- UNDO : Click to clear the last marked geolocations. This is applicable only when you have manually marked a geolocation.
- Click SAVE. Now you can see the geo locations pinpointers on the maps
The geofence is created. Now the geofence can be used in rules.
Voice media
This feature allows you to create folders and upload voice media files into the folders. These files are used in Flow Builder to create single or multi-language voice flows. You can easily map the same media across multiple languages within the same flow without needing to create a separate flow for each language. As the media files are segregated into different folders, you can easily select necessary files while creating voice flows. You can create local language folders within the main folder. If you delete a folder, all the files within the folder will also be deleted.
The standard followed is ISO 639-1.
The supported file types are MP3 and WAV. The size of the file to upload is limited to 10MB.
To upload a voice media file, follow these steps:
- From the IMIconnect menu, click Tools > VOICE MEDIA. The Voice Media screen appears. You can create different folders to upload files.
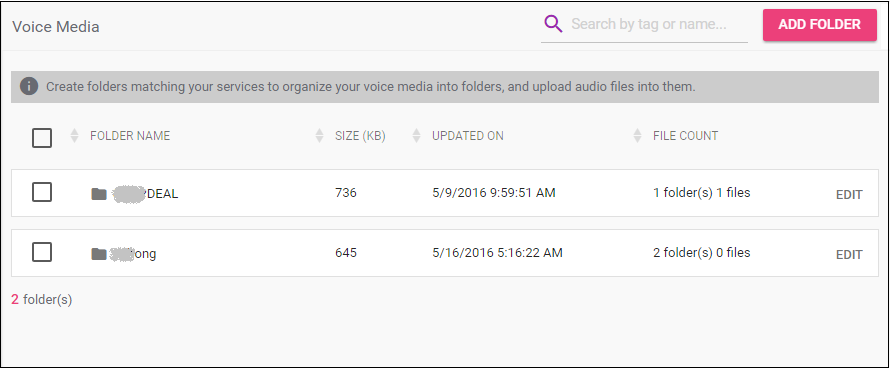
- Click ADD FOLDER. The ADD NEW FOLDER screen appears.
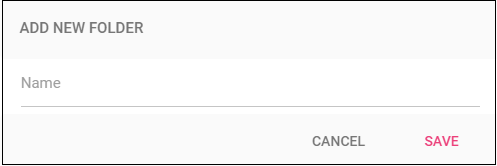
- Enter a folder name without any spaces and click SAVE. The folder gets created.
- Click the folder from the left menu. To upload a file, drag-drop an audio file in the grayed out area or click ADD NEW > UPLOAD. The grayed out screen is displayed only when the folder is empty.
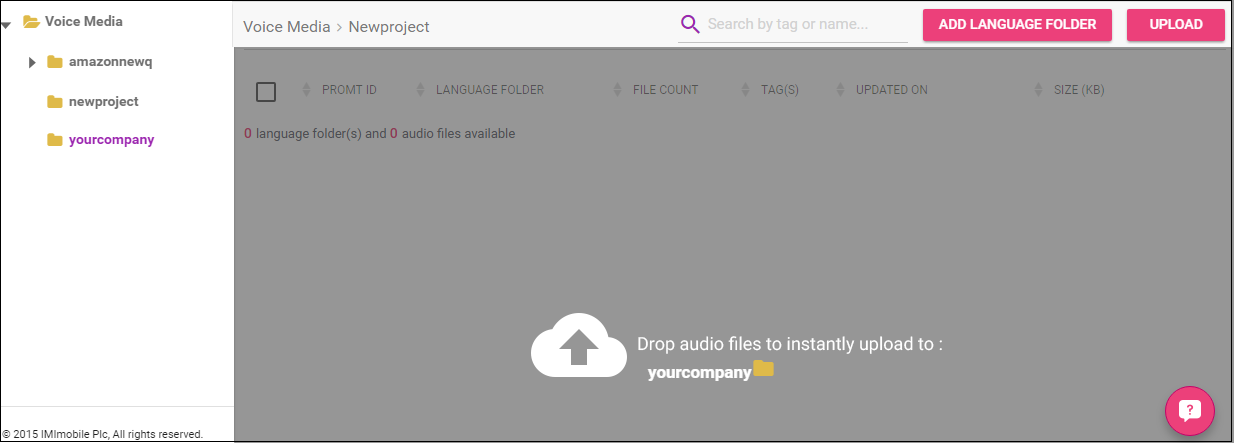
- To upload another voice file, click ADD NEW > UPLOAD and select the file to upload. You can add global voice files in this outer folder.
- For better control and configuring voice flows, language specific folders must be uploaded in language folders. Click ADD LANGUAGE FOLDER to setup multi-language folders and upload audio files into them. Each audio file uploaded into respective language folders must have the same file name.
- To upload a voice file to language specific folder, follow the steps 4 and 5.
You can also record voice and use them in voice flows.
- To record a voice, navigate to the folder where you want to add a voice file and click ADD NEW > RECORD A CLIP.
- Enter the recording name in the screen that appears and click NEXT.
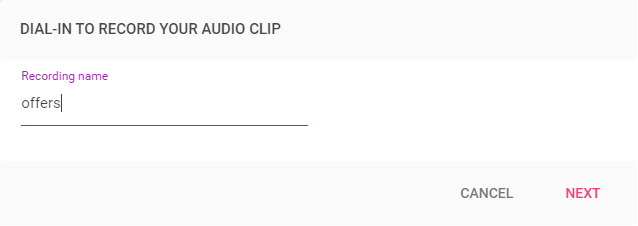
- Select the country from the drop-down. A dial-in number and a pin is displayed. Dial the number from your phone and follow the instructions that you hear. You may be asked to enter the pin followed by # key. When the recording is completed, you must refresh your browser to see the recording in the folder.
- To delete a voice file or folder, select the respective voice file or folder checkbox and click DELETE SELECTED.
- To add a TAG to a voice file, double-click on the tag column of the respective voice file and enter a name. Click the tick once you are done. These tags are used in voice flows.
SMS restrictions
This feature allows you to view the country specific restrictions for sending and receiving SMS.
To view the SMS restrictions, follow these steps:
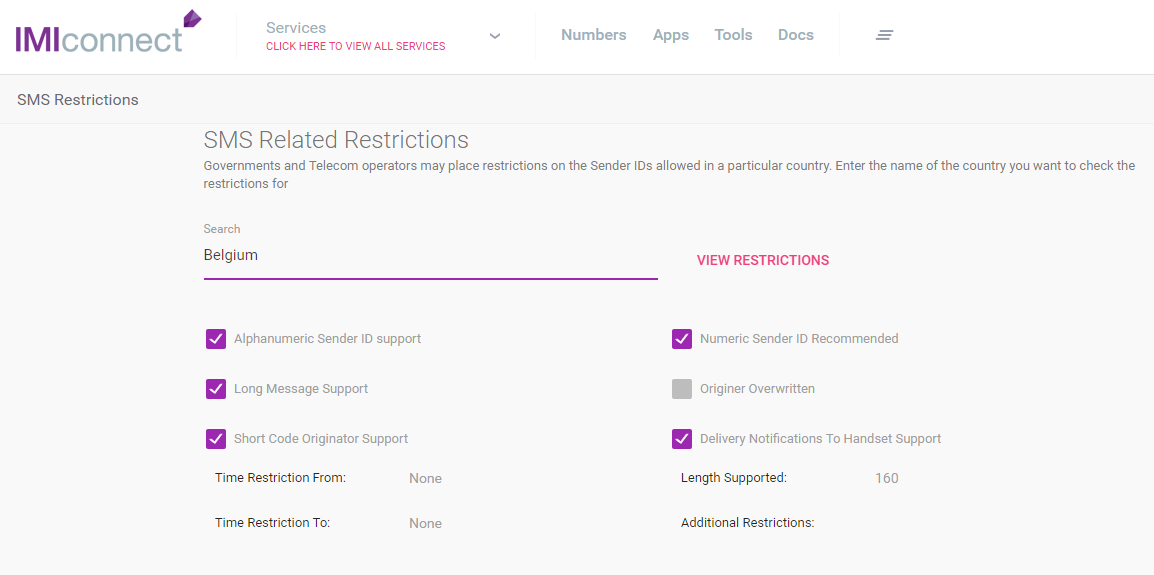
- From the IMIconnect menu, click Tools > SMS RESTRICTIONS. The SMS Restrictions screen appears.
- Enter the country name in the Search area and click VIEW RESTRICTIONS. The country specific restrictions are displayed.
Number restrictions
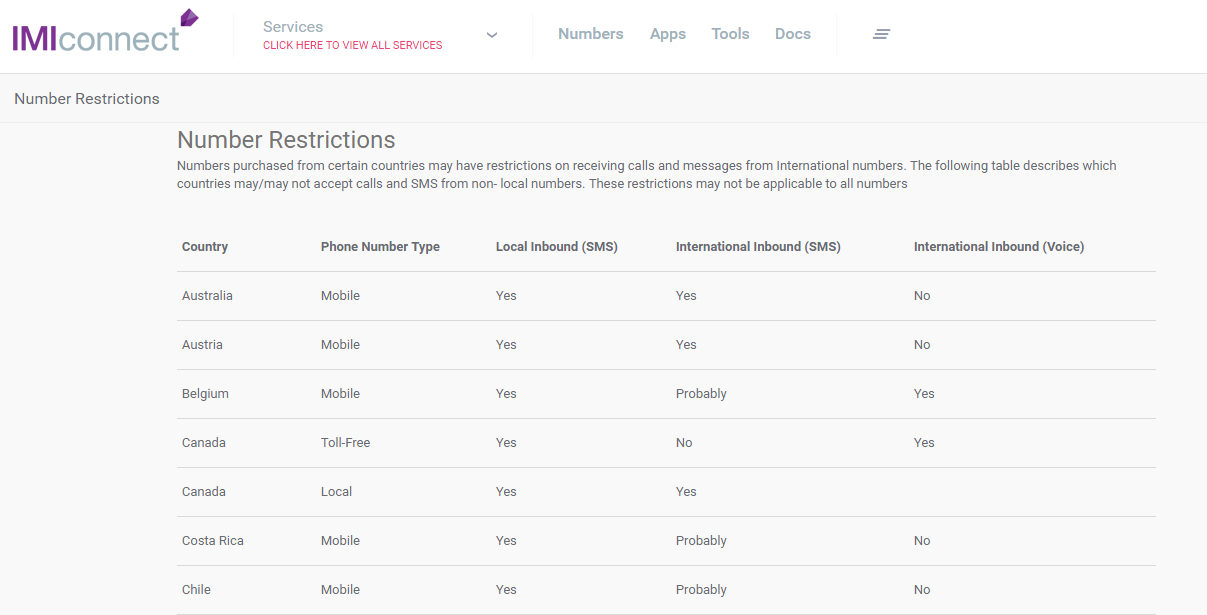
This feature allows you to view the country-specific restrictions for using phone numbers. Some countries have restrictions to accept calls from non-local numbers.
To view the number restrictions, follow these steps:
- From the IMIconnect menu, click Tools > NUMBER RESTRICTIONS.
- The restriction details are displayed for IMIconnect supported countries.
Integrations
This feature allows you to configure the supported integrations with other products. Following are the supported integrations:
Smart link
Smart link feature allows you to create a unique Smartlink for a long URL. Smartlink in messages will consume less space. You can create a Smartlink with your brand. When an end user clicks on a Smartlink, the individual link analytics can be tracked. A Smartlink can be configured to expire after a certain duration. A user will be redirected to another URL when clicks on an expired Smartlink. You can configure a Smartlink to open device specific links. When device specific link is configured, it takes precedence over the long URL. You can view and download the reports of the Smartlinks created during a specific period.
Advantages of Smartlinks:
- You can create a Smartlink for a lengthy URL that cannot be accommodated in messages.
- You can track the users who clicked on Smartlink.
- You can redirect the users when an expired link is clicked.
- You can create a Smartlink to promote your brand.
For example, Smartlinks are useful to monitor the users response of a promotion activity that was launched through SMS.
To create a Smartlink, follow these steps:
- From the IMIconnect menu, click Tools > SMARTLINK. The Smartlink screen appears.
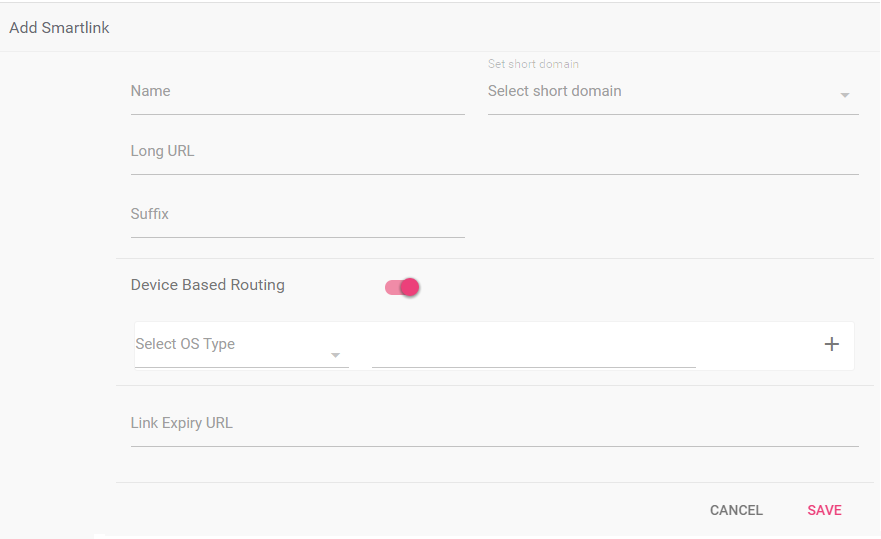
- Click ADD URL. The Add Smartlink screen appears.
- Enter the following information:
| Option | Description |
|---|---|
| Name | Specifies the name of the Smartlink. |
| Set short domain | Specifies the short domain. This domain must be registered with IMIconnect. To register your domain with IMIconnect, contact IMIconnect support team. |
| Long URL | Enter the long URL that has to be shortened. |
| Suffix | Specifies a text that will be suffixed to the short domain. This will be useful for branding the links. For example, https:///OFFERS |
| Device Based Routing | Useful to configure OS specific links. When you enable this option, OS specific links can be configured. Select the OS from the drop-down and enter the OS specific URL. Click + to configure additional URLs. |
| Link Expiry URL | User is routed to this URL when clicks on a short URL that is expired. The URL expiry settings can be specified in Messaging API and Send Node configuration in Flow Builder. |
- Click SAVE. The short link is displayed as shown.

- To copy the URL, click the icon next to the short URL.
- To change the status of the URL, drag the slide bar towards left. The status of the Smartlink will be inactive.
- To make changes to the URL, click EDIT and make appropriate changes.
- To delete a URL, click DELETE.
- To the reports on the URL, click REPORTS.
- To view the reports of multiple URLs, select the check box of the required URLs and click SHOW DETAILED REPORT. A report is generated.
- Use the filters option to filter the data using tag and OS.
- Click DOWNLOAD REPORT to download the report in .xls format.
- Select the period to view the report for the selected days.
When the short link id is used in messages, a new Smartlink is generated by the system that will be unique link for each message receiver.
For example, to send an SMS with Smartlink, use the below format.
Dear $(name), 50% discount on our products. To avail the discount, click {{link_}}.
When the message is sent, the {{link_}} is replaced with a system generated Smartlink URL.
The linkid must have been created using IMIconnect.
//SMS with Smartlink
{
  "channels":{
    //Smartlink array must be available to replace {{link_<linkid>}} information in all messaging channels.
      "smartlinks":[
        {
            "linkid": 5,
            "validity": 30
        }
      ],
    "sms":{
      "type":1,
      "text":"Sending first SMS with IMIconnect. Click the link to get surprise gift {{link_5}}",
      "senderid":"CONNCT",

    }
  }
}
Updated almost 3 years ago