Creating Rules in Services
Rules allow you to automate minute tasks within a service. Rules are configured on events and they trigger conditions on those events. These events and conditions are complemented with actions that are executed once the conditions are met.
A single service can have multiple rules and the status of each rule can be configured individually based on the requirement. Each channel has a unique set of events that can be configured to meet certain conditions to automate actions or initiate workflows.
An easy to use interface is provided that enables you to configure rules for selected channels. The channels will be available in the rules that are configured in the Apps screen.
Some uses of the rules are:
- add actions
- send SMS
- send messages on Social media channels (Facebook, Twitter, WeChat)
- send Push notification messages
- notify URLs
- create conditional events
- execute custom events
- invoke a flow
- initiate a outbound voice call
Create a New Rule
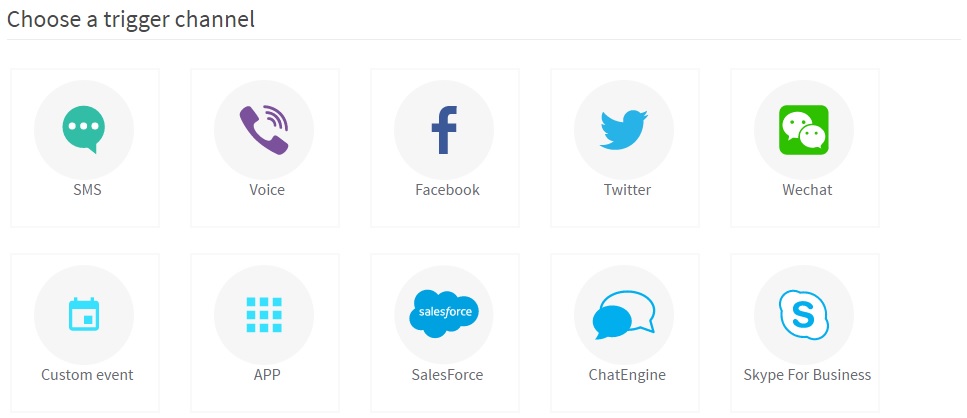
Set up a rule to automate certain tasks from the platform when events on any of channels meet the condition defined within the rule. Below screen shot depicts the channel selection screen, when all the channels are configured for a service. The channels are:
- SMS
- Voice
- Salesforce
- Custom event
- App

To create a rule, follow the steps below:
- Select an appropriate channel.
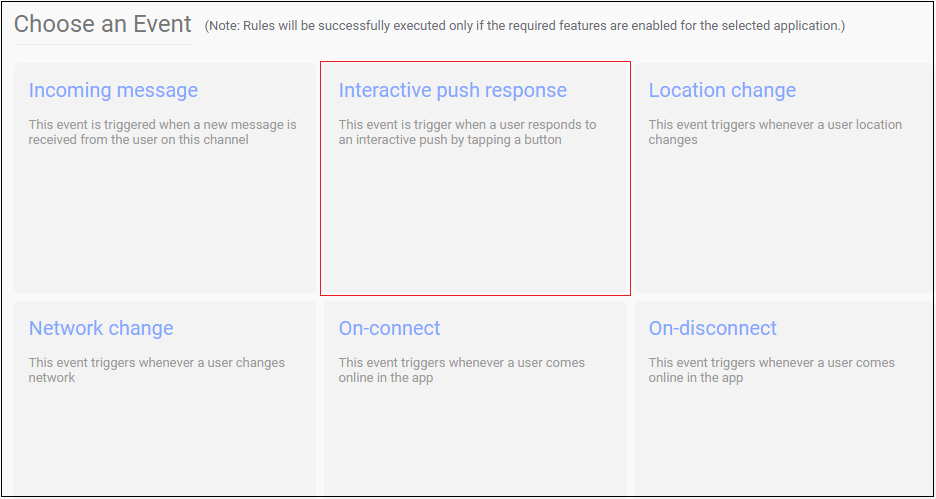
- Choose an event. For more details on events, see Possible Events for Channels section.
- Add conditions to the rule. If you do not want to add any conditions, you can skip this step and navigate to Actions.
- Select an action such as Send SMS or cross channel message or invoke a flow.
- Enter the message for the selected action.
- Enter a name for the rule and select the duration for the rule to execute.
- To activate the rule, select Active.
- Click SAVE & SUBMIT.
Optionally, you can enter a URL to notify on rule execution.
You cannot delete a rule. If a rule is no longer used in any service, from the drop-down make the rule Inactive. The rule will be deactivated.
Cross-channel messaging is available for customer profiles that are already existing in IMIconnect.
Configuring the conditions
To configure a condition, select the Variables, Operators, and appropriate value for the selected operators. Multiple conditions can be configured within a rule. Proper nested operators should be used while configuring multiple conditions for the desired result.
Rule Operator
Operators allows the clients to perform the conditional operation in order to obtain the required value of event variable to trigger action. The operators includes equals / not equals, in / not in, contains, greater than / equals to or less than, etc., Most of the operators have literal meaning, few complex operators are explained below.
startswith & endswith
Starts with indicates the starting character while the Ends with indicates the final characters to be considered for triggering the action.
geo-enter
This event operator reports a customer's location to IMIconnect through accurate GPS, when he/she enters an existing geo-fence. This geo-enter can be considered as entering restaurants, city or any other custom fence.
For example: KFC is the designated geographical area which is also called as 'new location'.
Here in this scenario geo-enter would mean when the user enters into the KFC, which is a predefined geographical location from outside the fence i.e. old location. The client can set the reminder for the deals in KFC, when the customer entered into Geo-enter (new location), and then the Customer automatically gets the notification about the deals at KFC on his/her mobile device.
geo-leave
This operator is opposite to geo-enter, reports when the user leaves the KFC, that is, steps outside of the geo-fence. This also reports the event of customer's leaving the defined geo-fence to IMIconnect. Rules automatically send message of any of the channels, asking for feedback when a customer leaves a geo-fence can be configured.
geo-within
This feature enables to trigger that the user is within the configured geo-fence location. Once an incoming event meets these trigger conditions, the actions defined in the rule are automatically executed.
Rule Actions
Actions for a rule can be sending a message on any of the channels, notifying an external URL or initiating a workflow. For sending an outbound message, the client can either enter the message or use one of the existing templates while configuring the rule. Notify URL can be entered directly on the UI and flow to be triggered can be selected from the drop-down list. Multiple actions can be added within a rule.
Complete list of action that can be associated with a rule is given below.
- Send SMS
- Send RTM Message
- Send Twitter Direct Message
- Send WeChat Message
- Send Facebook Message
- Send app push Message
- Notify a URL
- Invoke a Flow
- Initiate voice outbound
Using Rule Execution notify URL
The URL to notify option is used to notify whether a rule is executed successfully.
{
    "response": {
        "description": "execution success",
        "code": "812",
        "transid": "29c34052-de66-4f92-94df-f40a789a28f7",
        "ruleid": "510",
        "actions": [{
            "id": "1354",
            "status": "0",
            "type": "SEND_SMS"
        }, {
            "id": "1355",
            "status": "0",
            "type": "SEND_RTM"
        }]
    }
}
Parameter Details
Name | Description |
|---|---|
Code | Unique response code.
|
Trans id | Unique transaction ID for the event that triggered the rule. |
Rule Id | Unique ID of the rule. |
Action id | Unique ID for the action assigned while rule creation. |
Status | Execution status of the action.
|
Type | Action types, can take following values:
|
Possible Events for Channels
Table below describes the possible events for each channel.
| Selected Channel | Possible Events |
|---|---|
| SMS | Mobile Originated On link click |
| Voice | Inbound call Missed call |
| Account linking Authentication Incoming message On link click Postback Profile creation Profile update | |
| Incoming message On link click Profile creation Profile update | |
| Incoming message On link click Profile creation Profile update | |
| Salesforce | Account Created Account Updated Case Created Case Updated Opportunity Created Opportunity Updated Lead Created Task Created |
| Custom Event | |
| App | Incoming message Interactive push response Location change Network change On link click On web push click On-connect On-disconnect Profile creation Profile update Roaming change Subscribe Timezone change Unsubscribe |
Working with Interactive Push Response
- Open a service and click Rules.
- Click ADD NEW RULE. All the configured channels are displayed.
- Click APP. The event screen is displayed.

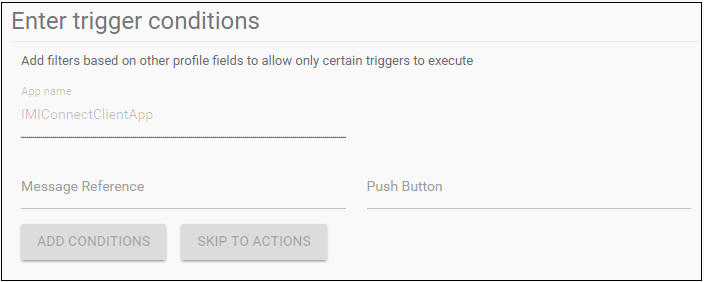
- Click Interactive push response. The trigger conditions screen is displayed.

- Enter the Message Reference and Push Button.
- Click ADD CONDITIONS to add specific conditions or click SKIP TO ACTIONS.
- Select an action such as Send SMS, cross channel message or invoke a flow.
- Enter the message for the selected action.
- Enter a name for the rule and select the duration for the rule to execute.
- To activate the rule, select Active.
- Click SAVE & SUBMIT.
Message Reference and Push Buttons are either a string or number that is configured as part of messaging API for RTM or PUSH channels.
To test your API request, you can use API Explorer to configure the Message Reference and Push button.
Updated over 2 years ago